BrandK POS
Troubleshooting
BrandK POS
Troubleshooting about BrandK POS
[Connection] – Error “ Network is unreachable”
Video
Step by Step Guide
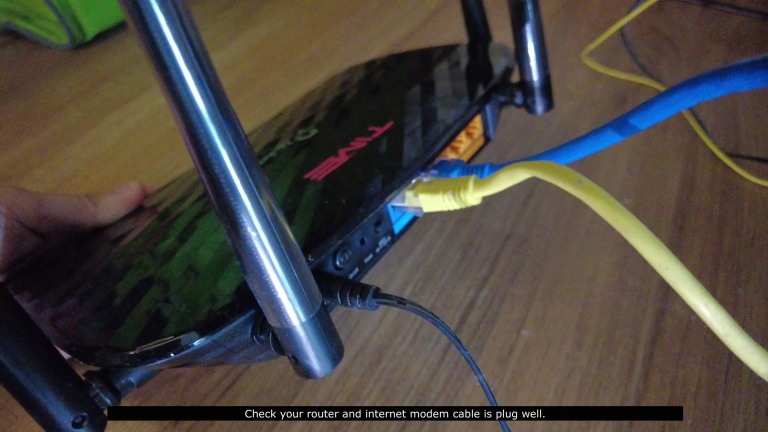 1. Check your router and internet modem cable is plug well.
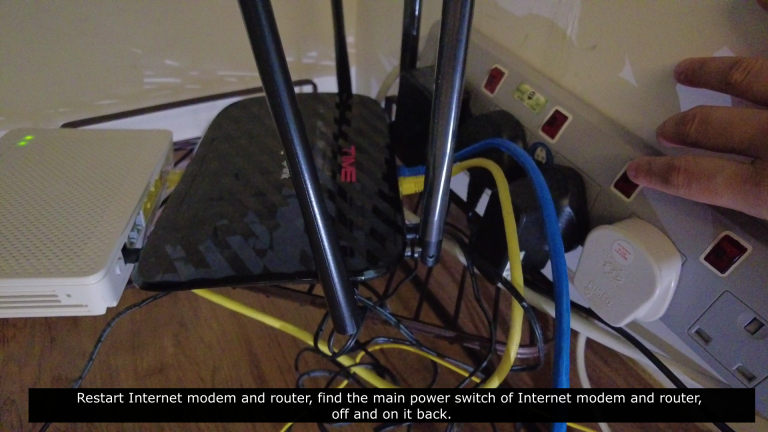 2. Restart Internet modem and router, find the main power switch of Internet modem and router, off and on it back.
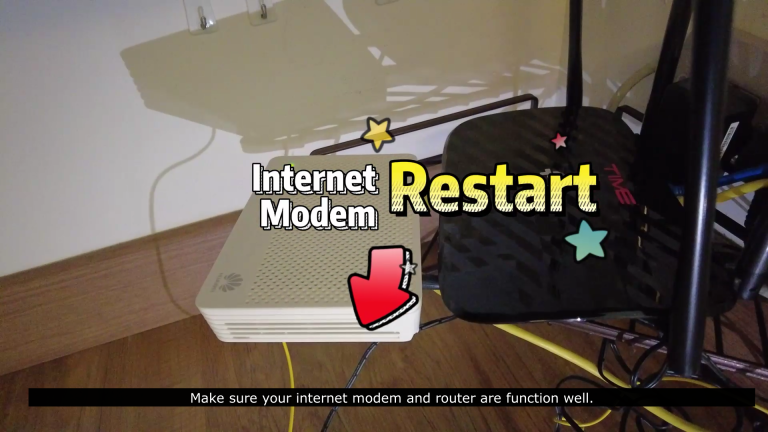 3. Make sure your internet modem and router are function well.
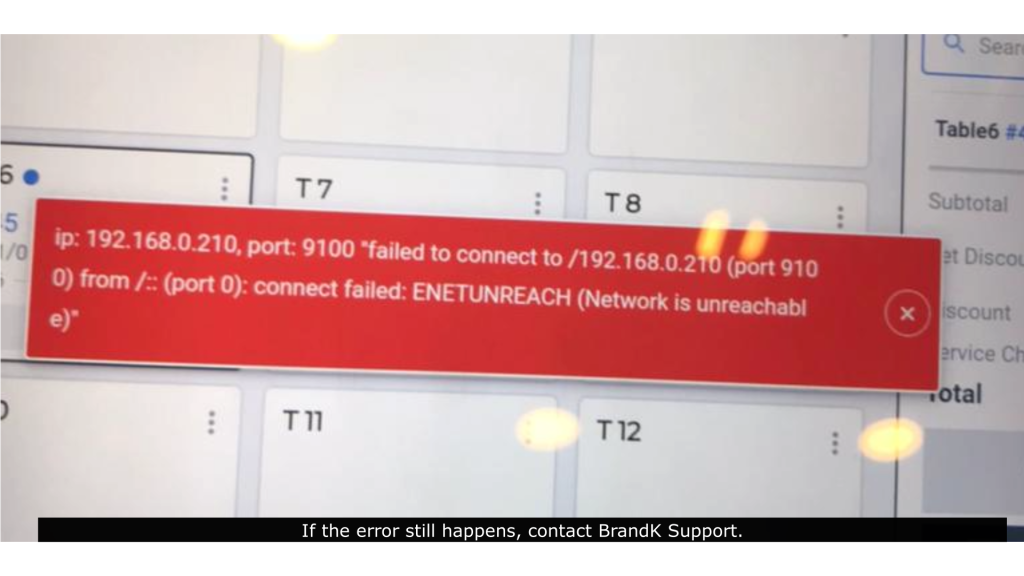 4. If the error still happens, contact BrandK Support.
[Connection] – KPOSServer cannot load / cannot connect (Tablet Version)
Video
Step by Step Guide
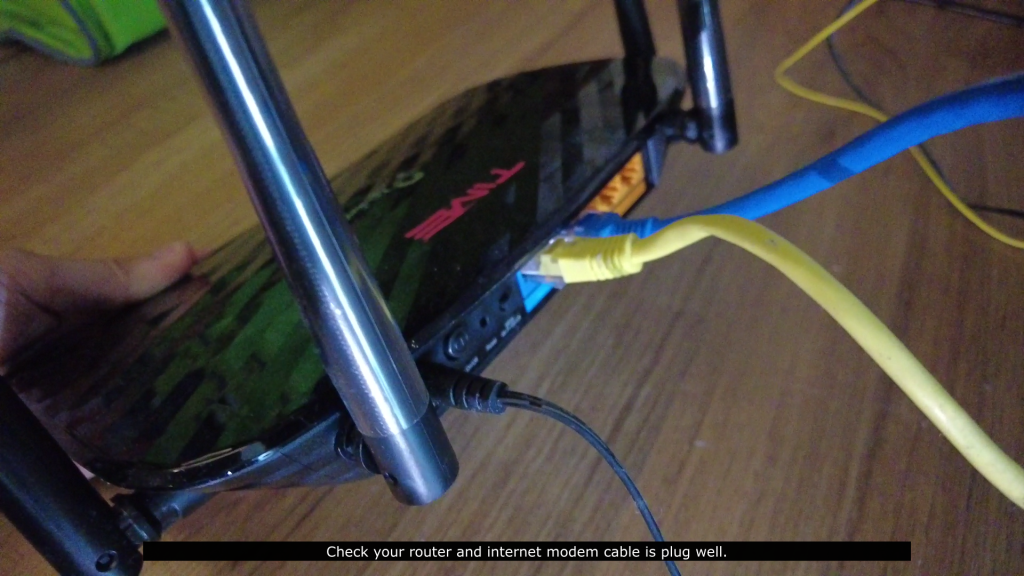
1. Check your router and internet modem cable is plug well.
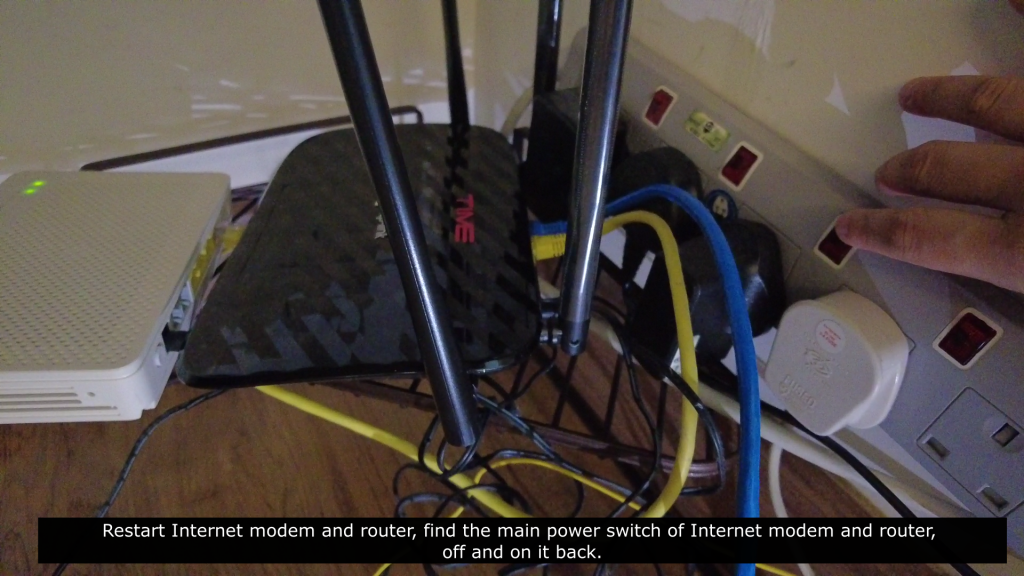 2. Restart Internet modem and router, find the main power switch of Internet modem and router, off and on it back.
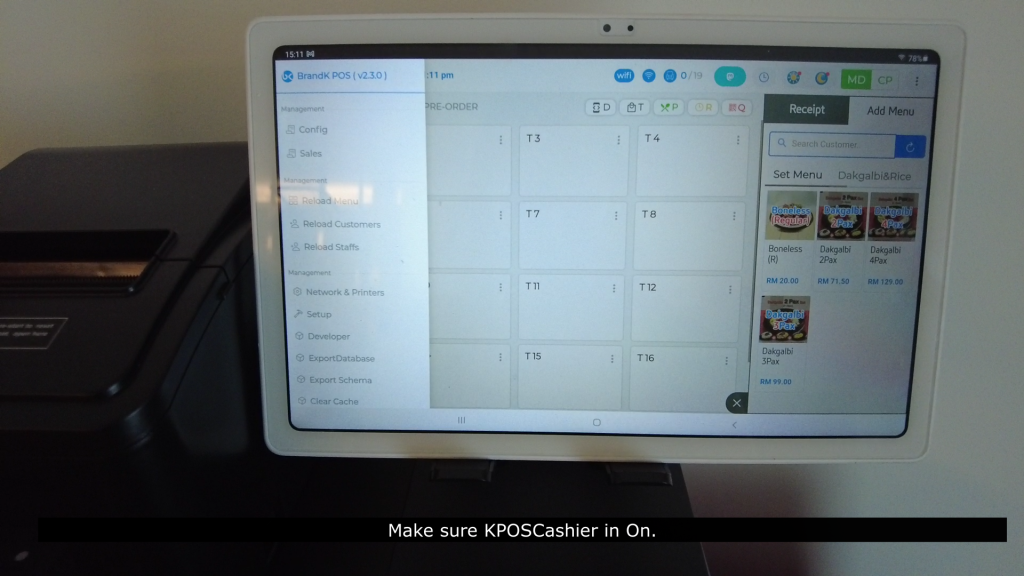 3. Make sure KPOSCashier in On.
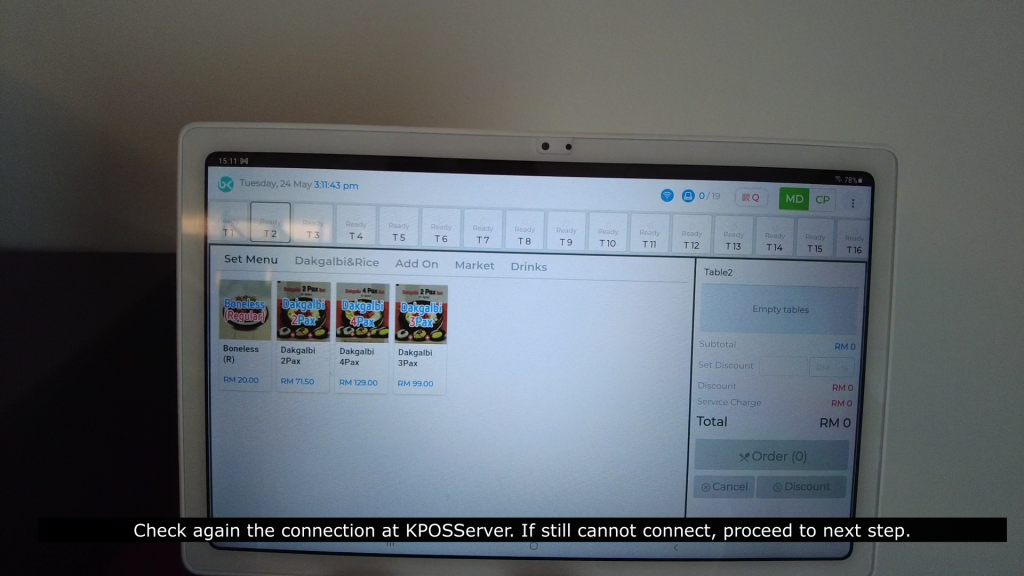 4. Check again the connection at KPOSServer. If still cannot connect, proceed to next step.
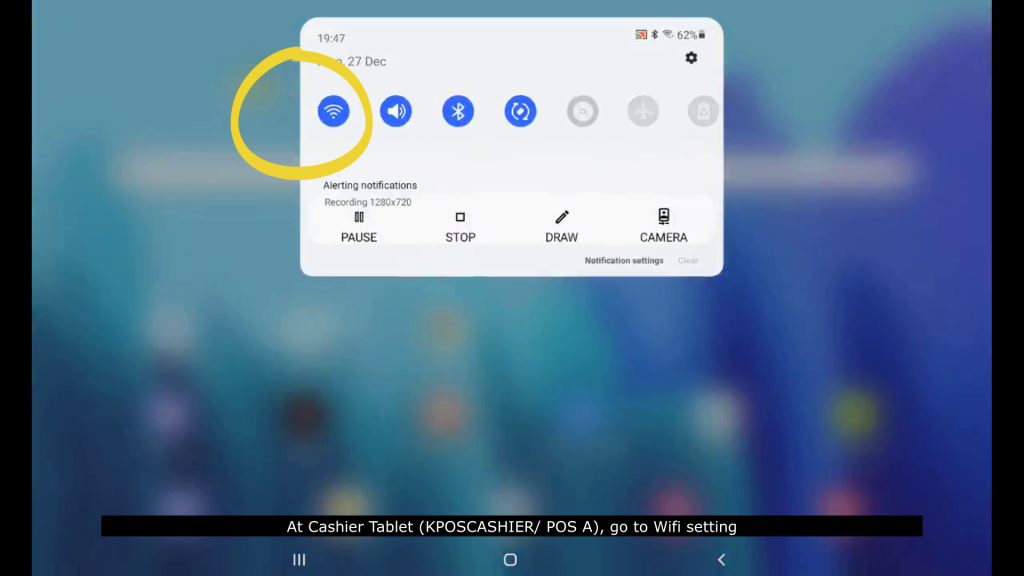 5. At Cashier Tablet (KPOSCASHIER/ POS A), go to Wifi setting.
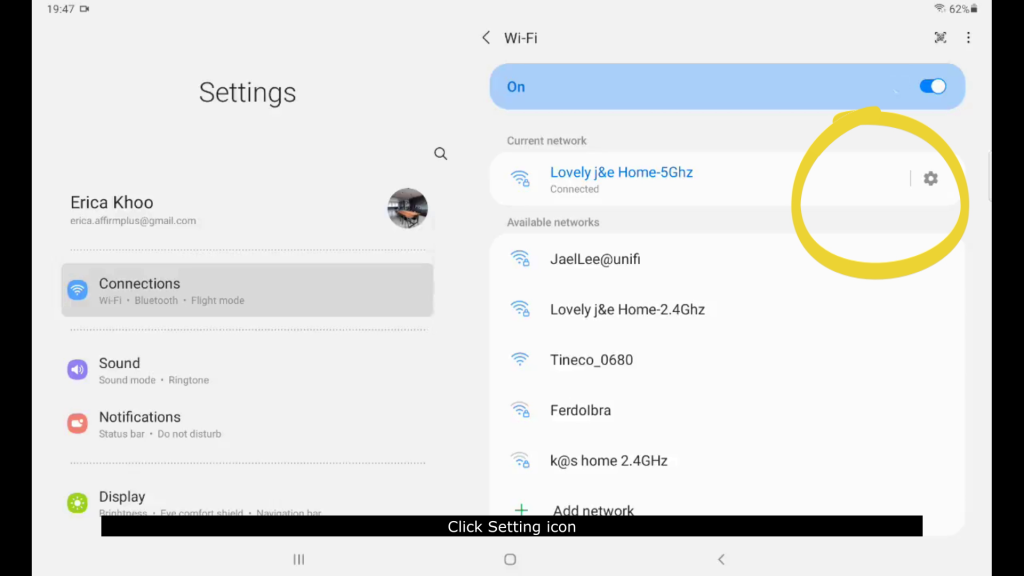 6. Click Setting icon.
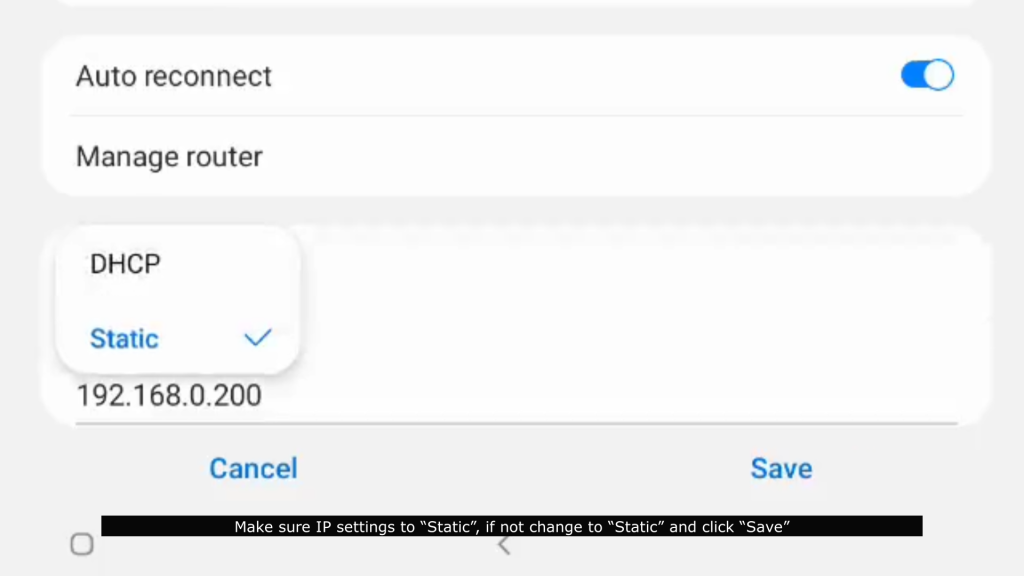 7. Make sure IP settings to “Static”, if not change to “Static” and click “Save”.
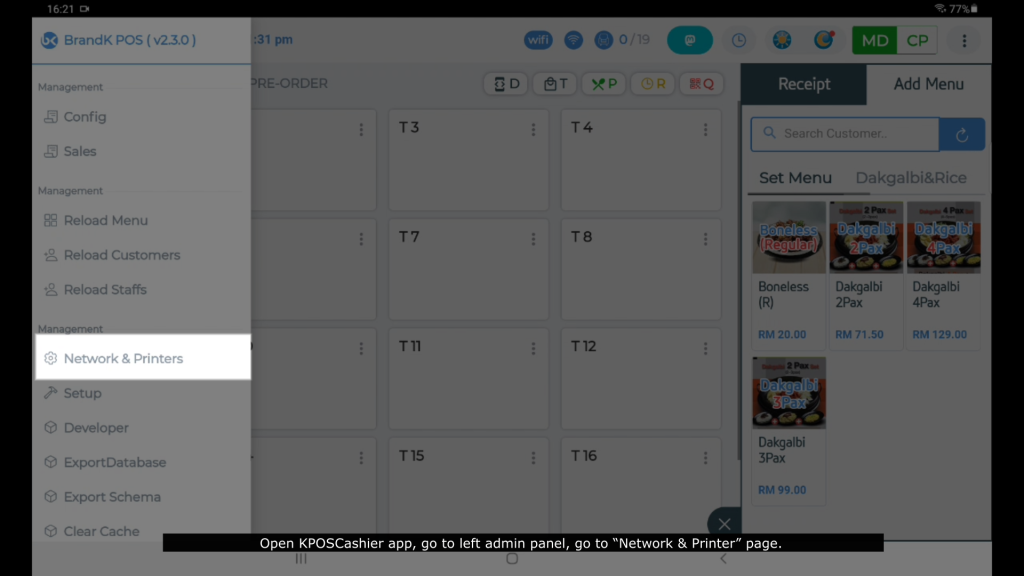 8. Open KPOSCashier app, go to left admin panel, go to “Network & Printer” page.
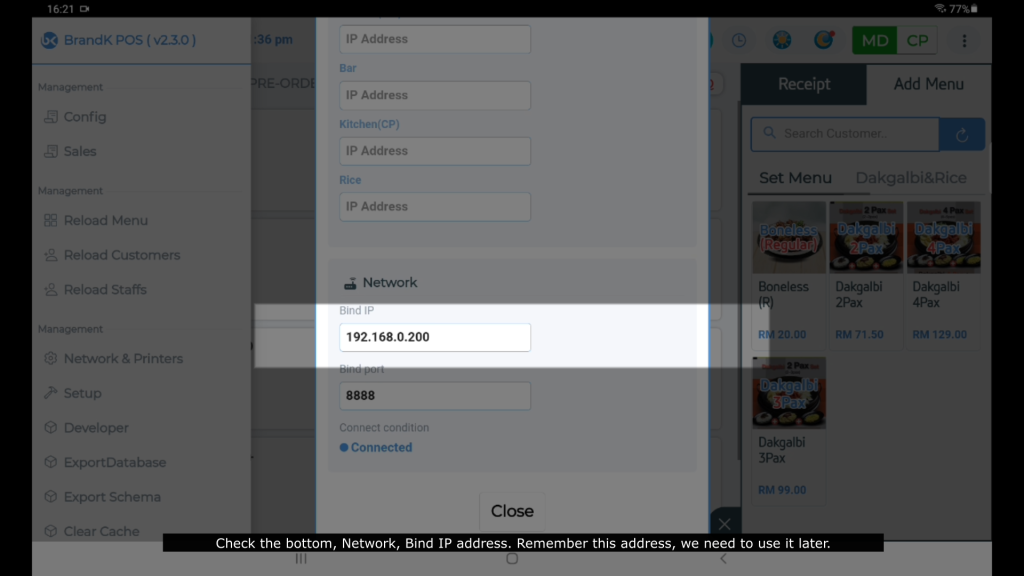 9. Check the bottom, Network, Bind IP address. Remember this address, we need to use it later.,
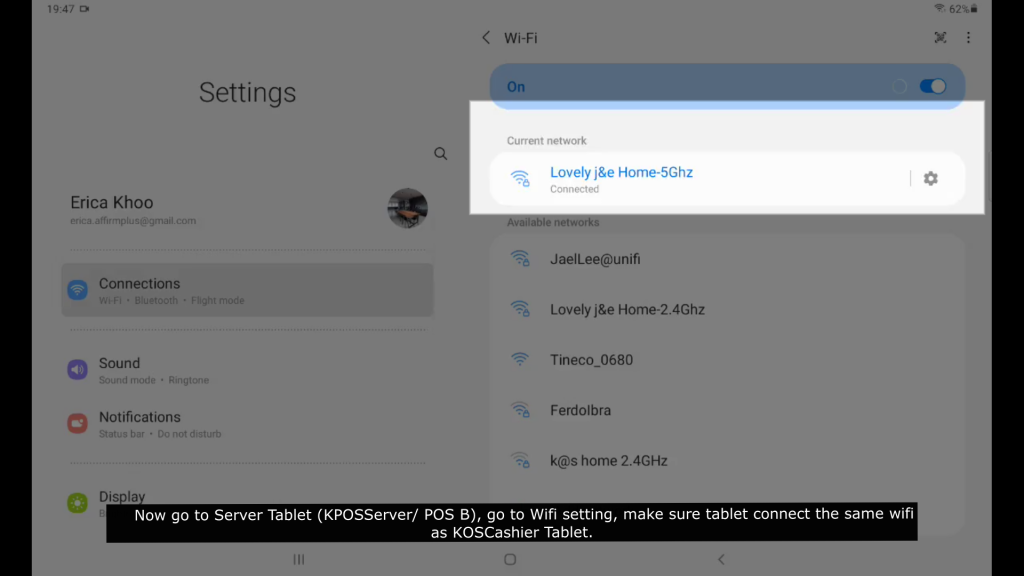 10. Now go to Server Tablet (KPOSServer/ POS B), go to Wifi setting, make sure tablet connect the same wifi as KOSCashier Tablet.
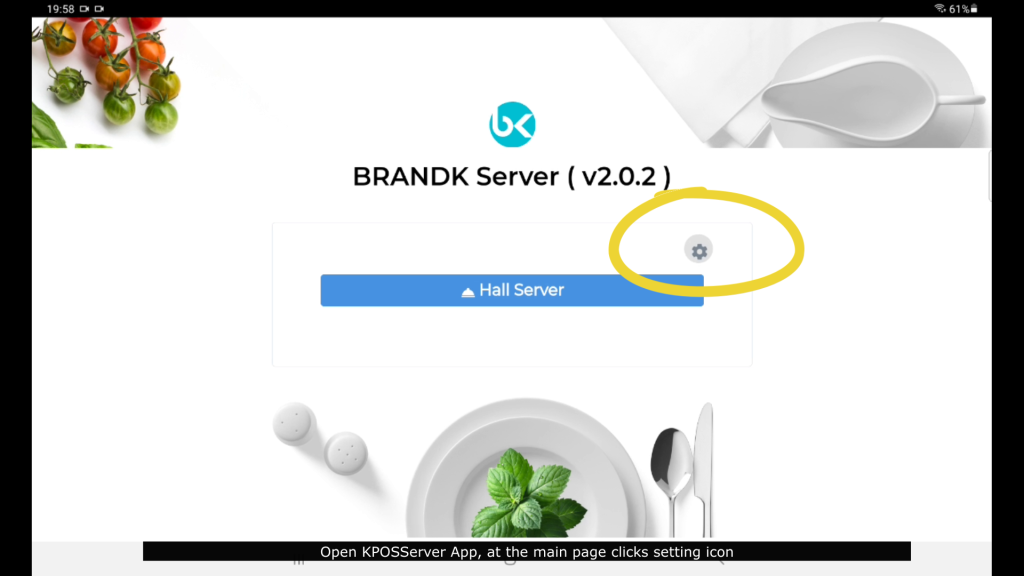 11. Open KPOSServer App, at the main page clicks setting icon
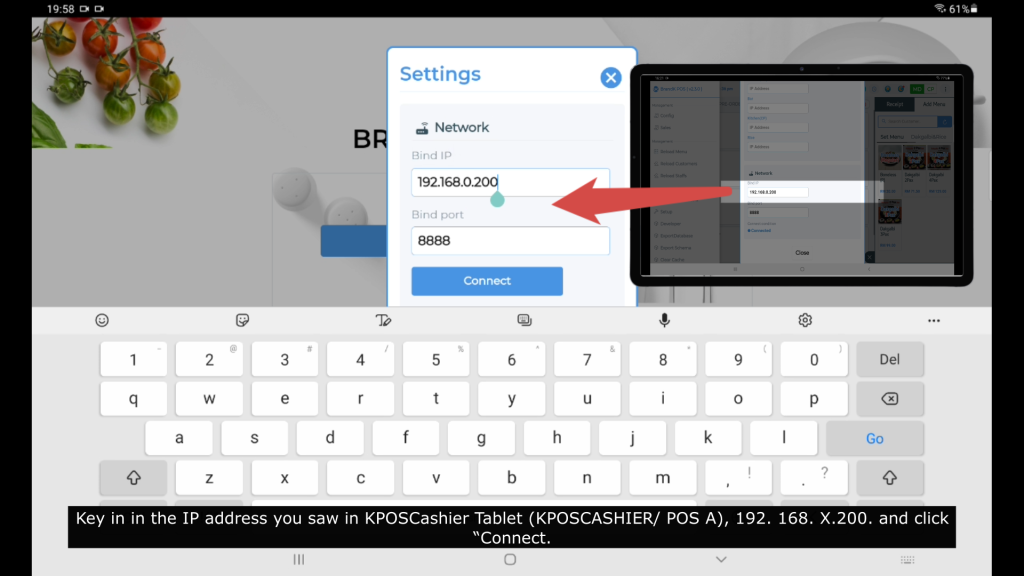 12. Key in in the IP address you saw in KPOSCashier Tablet (KPOSCASHIER/ POS A), 192. 168. X.200. and click “Connect".
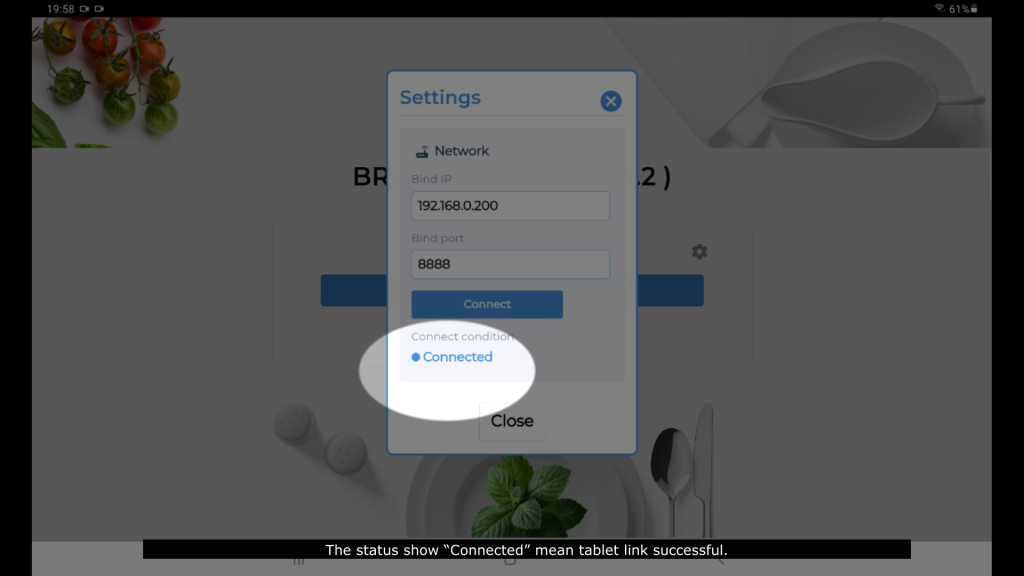 13. The status show “Connected” mean tablet link successful.
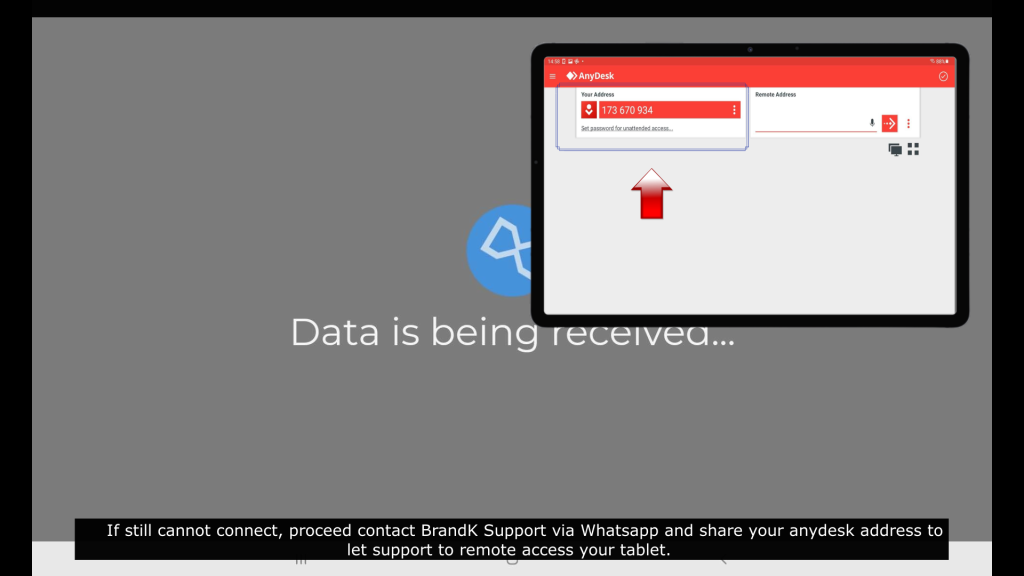 14. If still cannot connect, proceed contact BrandK Support via Whatsapp and share your anydesk address to let support to remote access your tablet.
[Connection] – KPOSServer cannot load / cannot connect (Mobile Version)
Video
Step by Step Guide
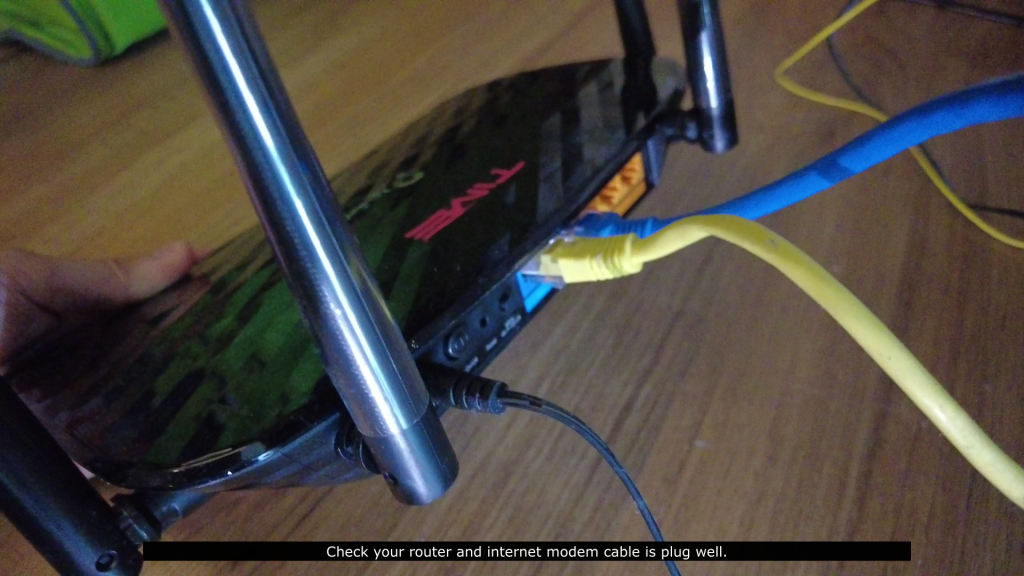 1. Check your router and internet modem cable is plug well.
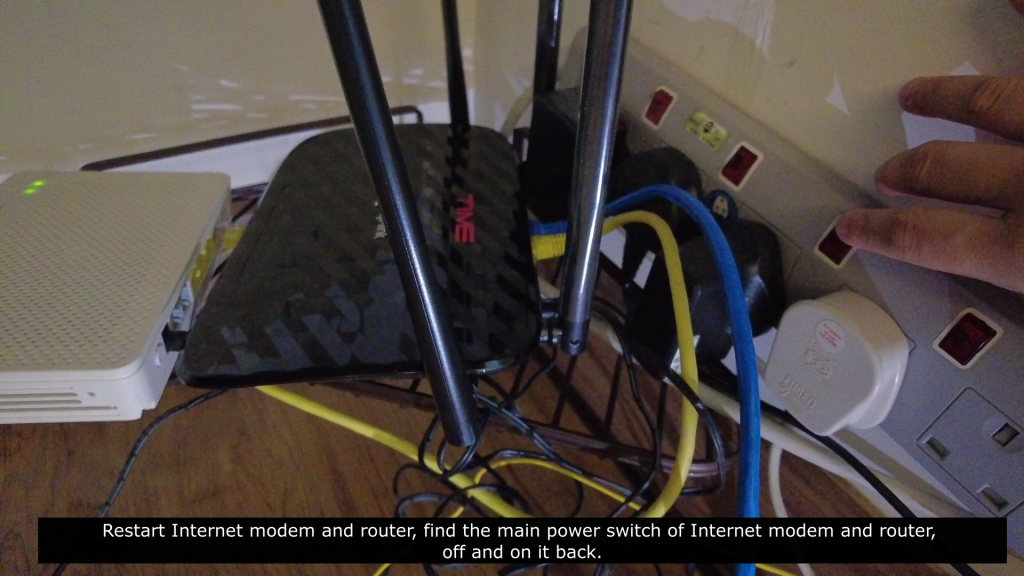 2. Restart Internet modem and router, find the main power switch of Internet modem and router, off and on it back.
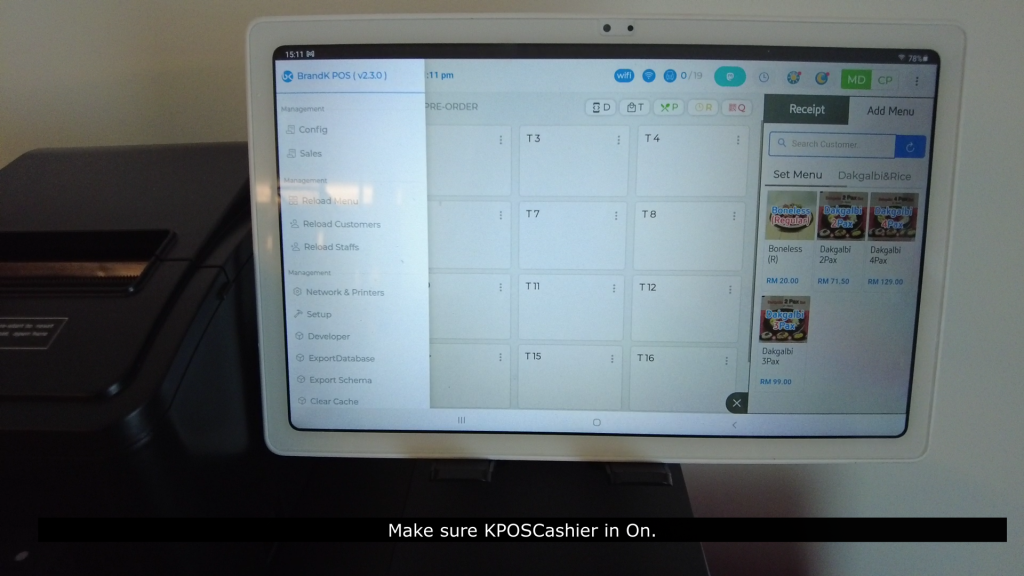 3. Make sure KPOSCashier in On.
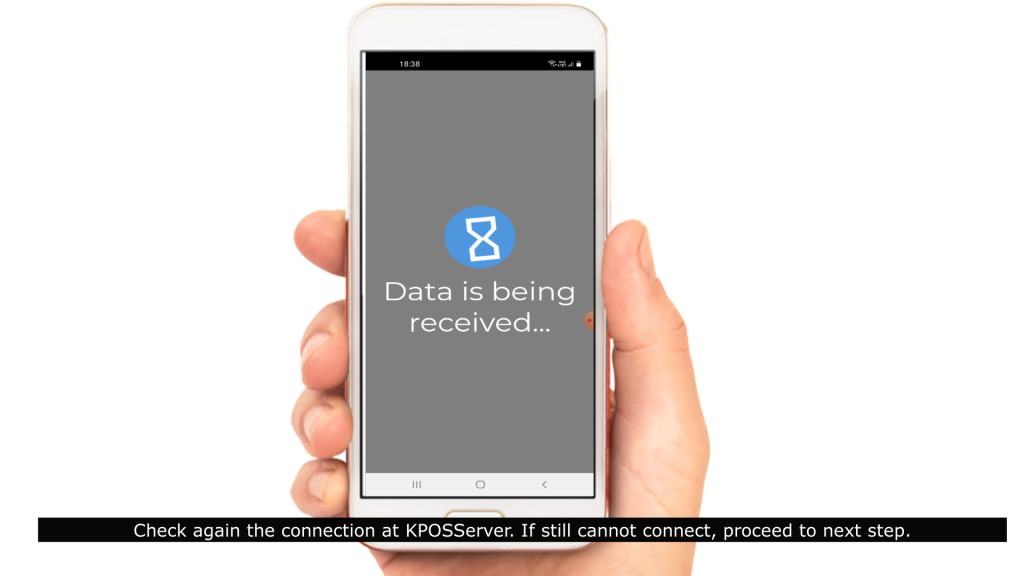 4. Check again the connection at KPOSServer. If still cannot connect, proceed to next step.
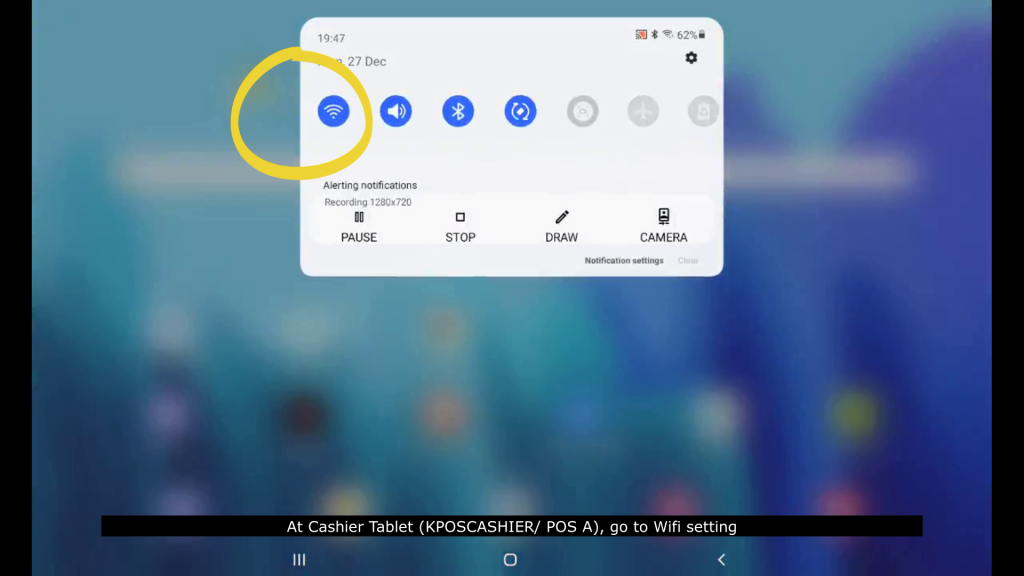 5. At Cashier Tablet (KPOSCASHIER/ POS A), go to Wifi setting.
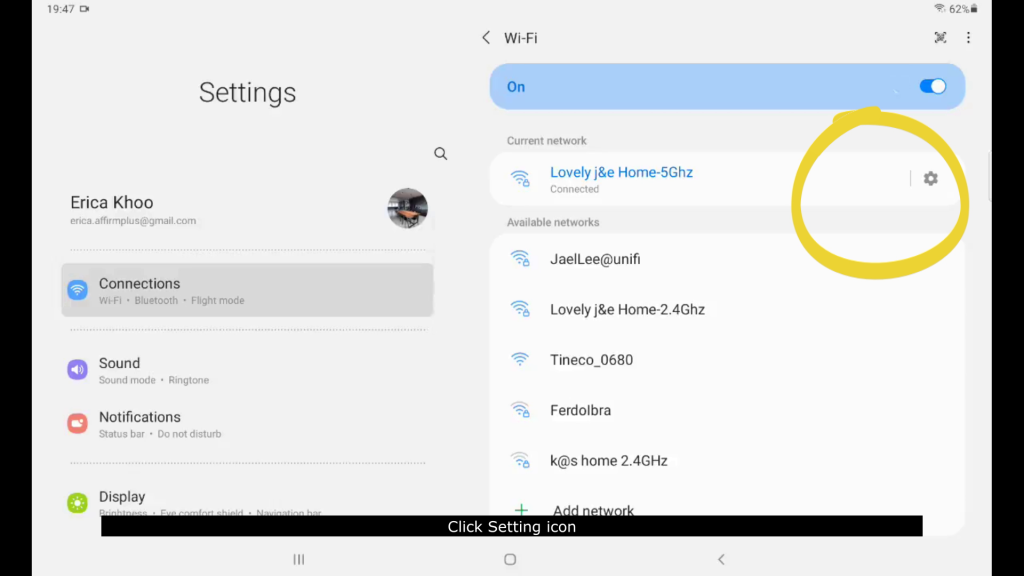 6. Click Setting icon.
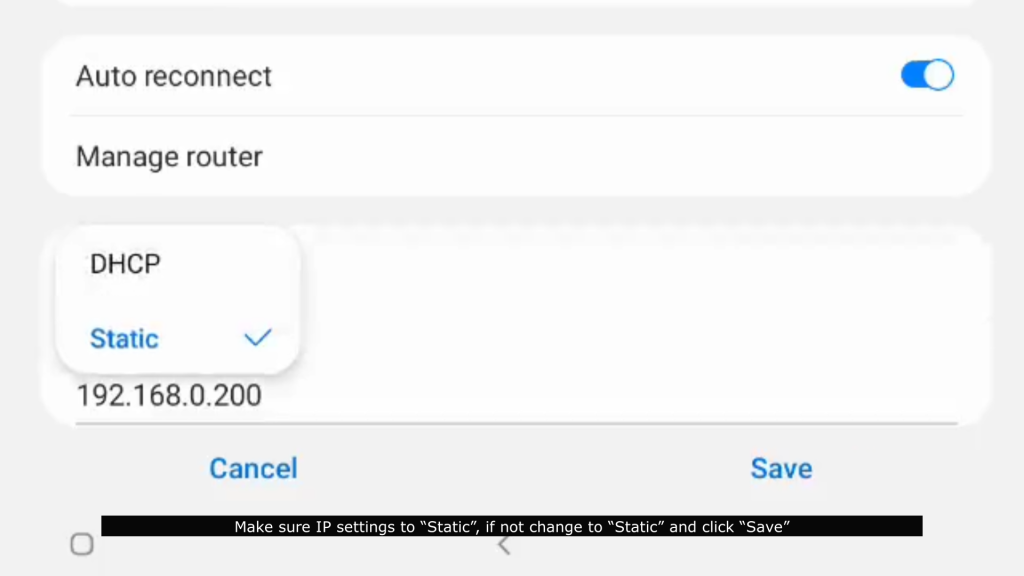 7. Make sure IP settings to “Static”, if not change to “Static” and click “Save”.
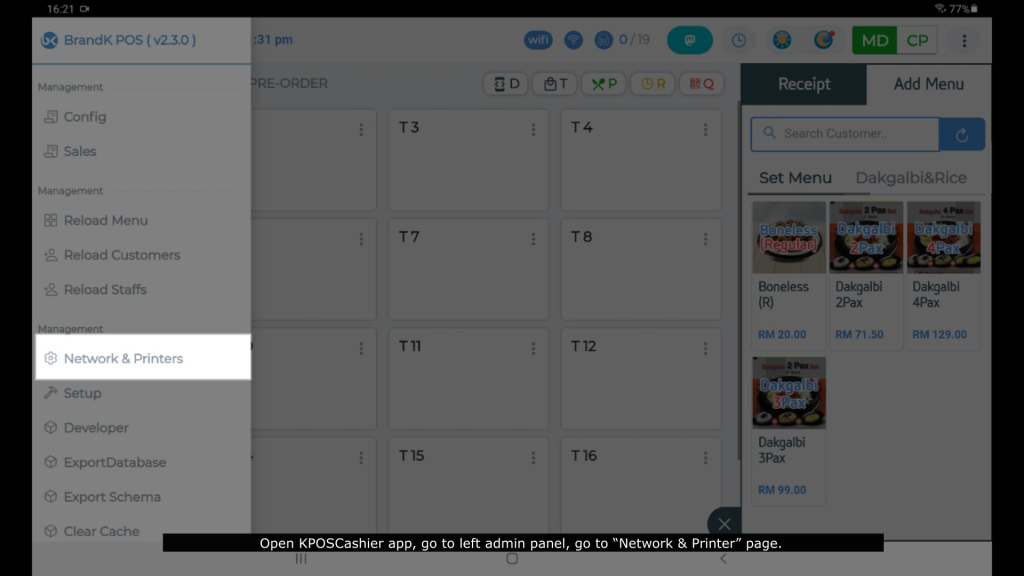 8. Open KPOSCashier app, go to left admin panel, go to “Network & Printer” page.
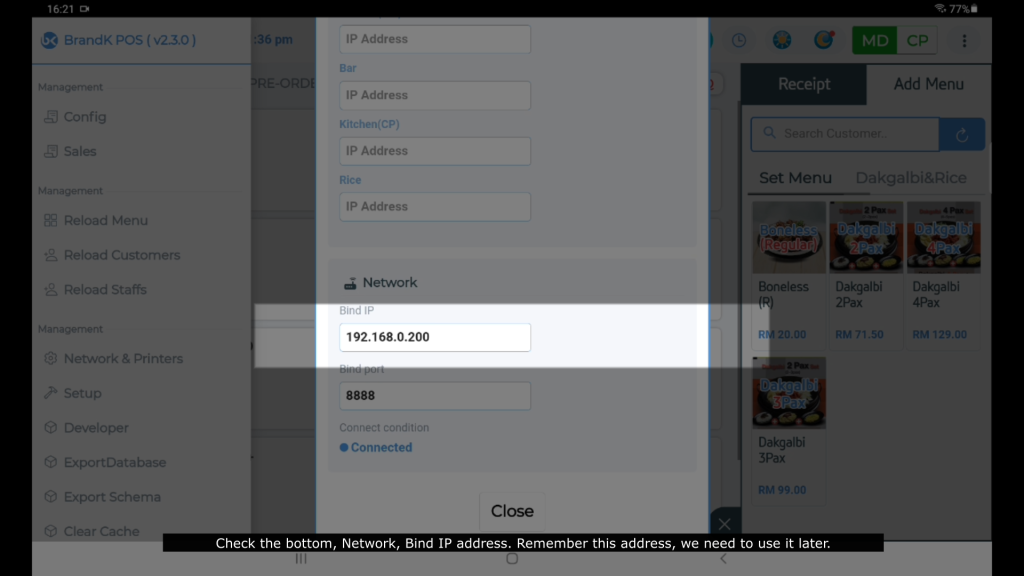 9. Check the bottom, Network, Bind IP address. Remember this address, we need to use it later.
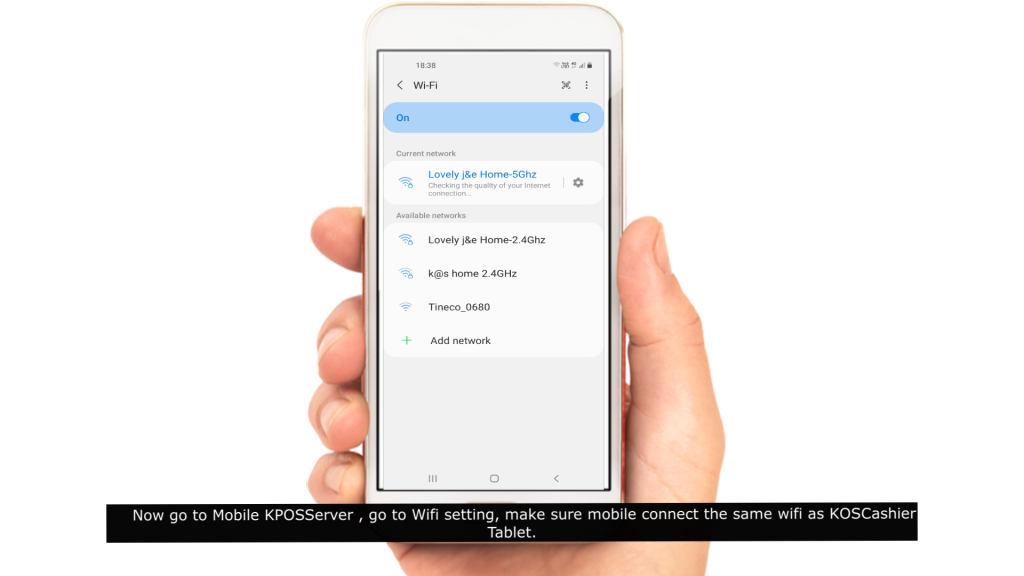 10. Now go to Mobile KPOSServer, go to Wifi setting, make sure Mobile connect the same wifi as KOSCashier Tablet.
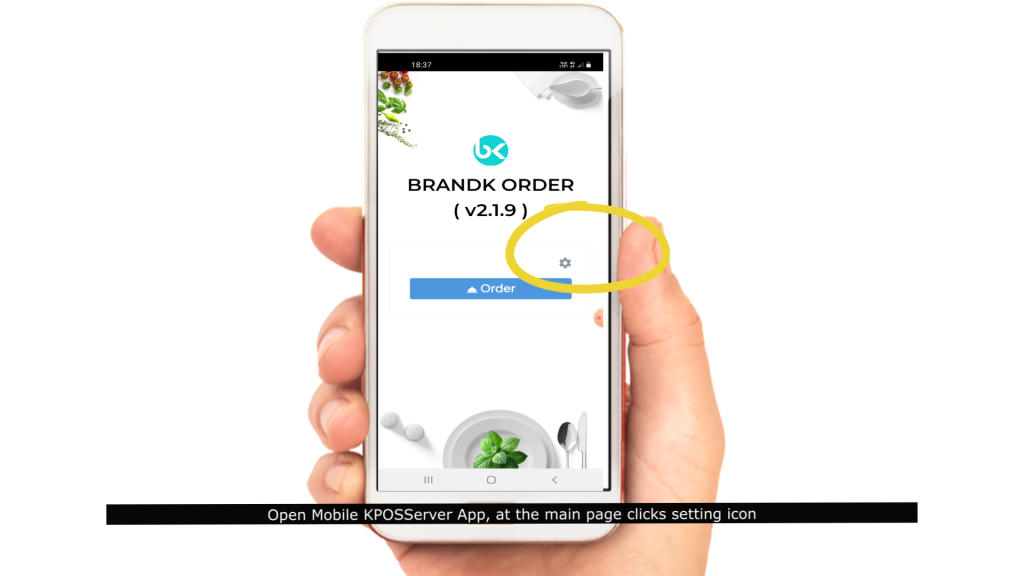 11. Open KPOSServer App, at the main page clicks setting icon.
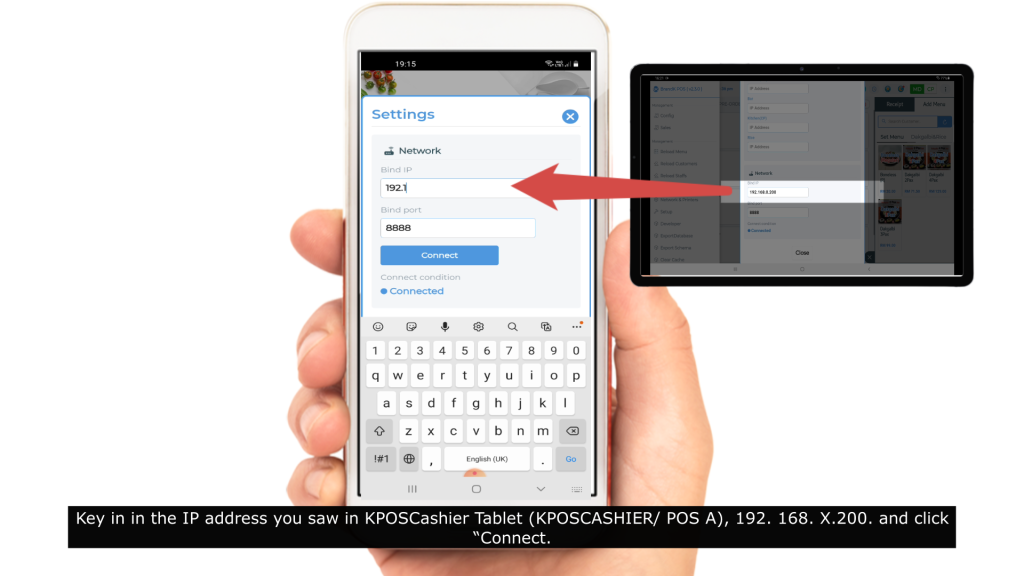 12. Key in in the IP address you saw in KPOSCashier Tablet (KPOSCASHIER/ POS A), 192. 168. X.200. and click “Connect".
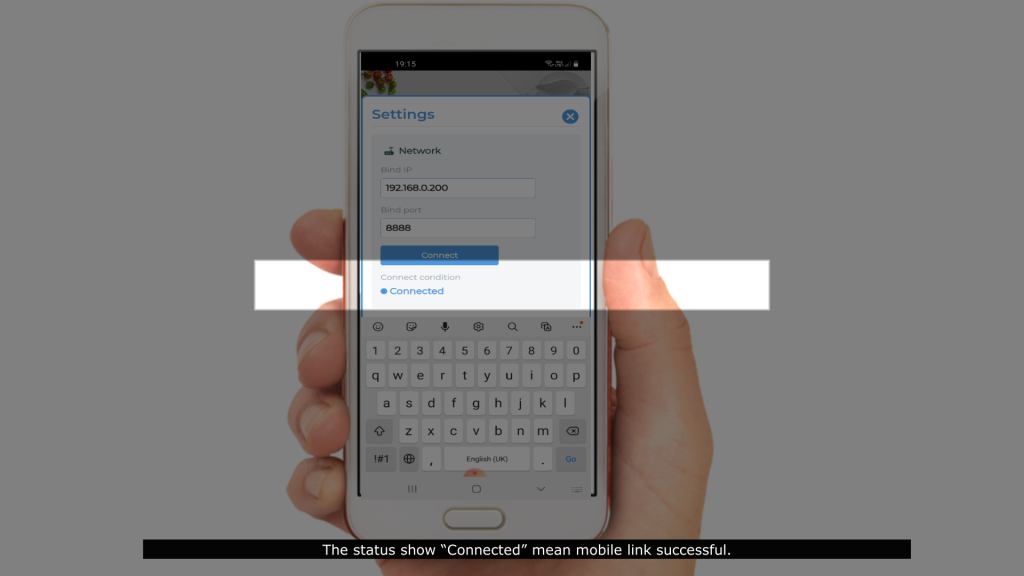 13. The status show “Connected” mean Mobile link successful.
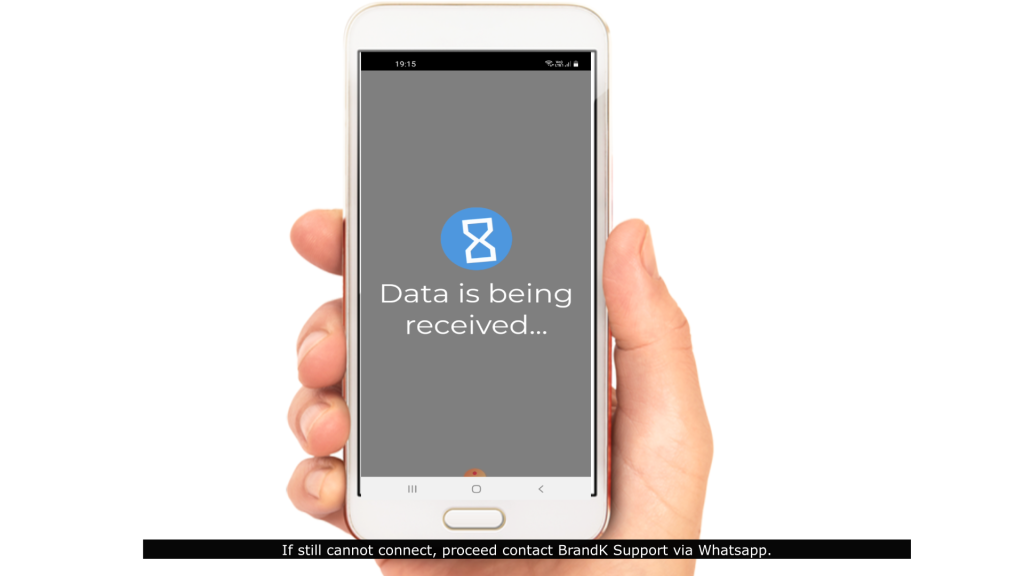 14. If still cannot connect, proceed contact BrandK Support via Whatsapp.
[Connection] – How to install&launch AnyDesk App?
Video
Step by Step Guide
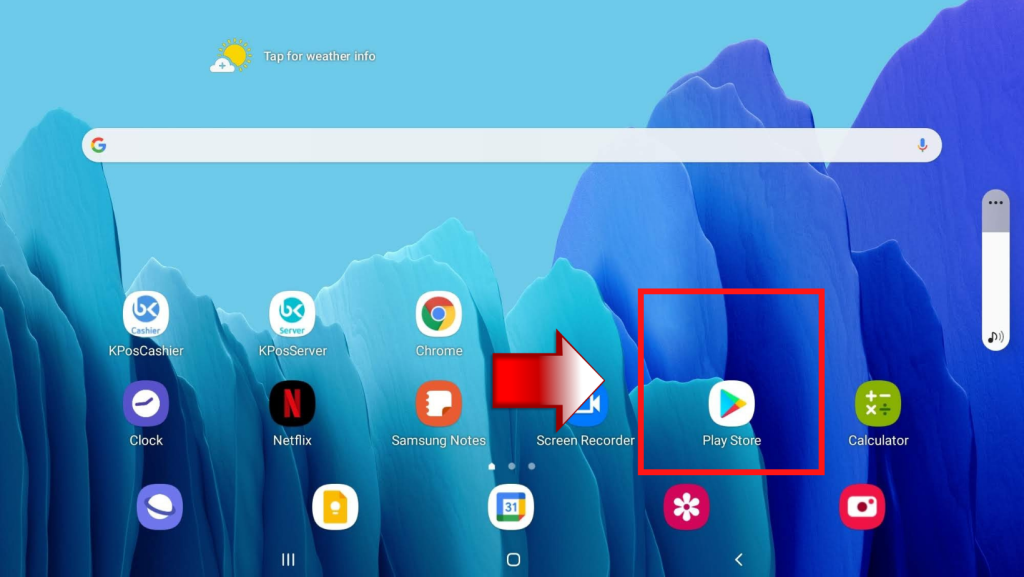 1. Go to google Play Store.
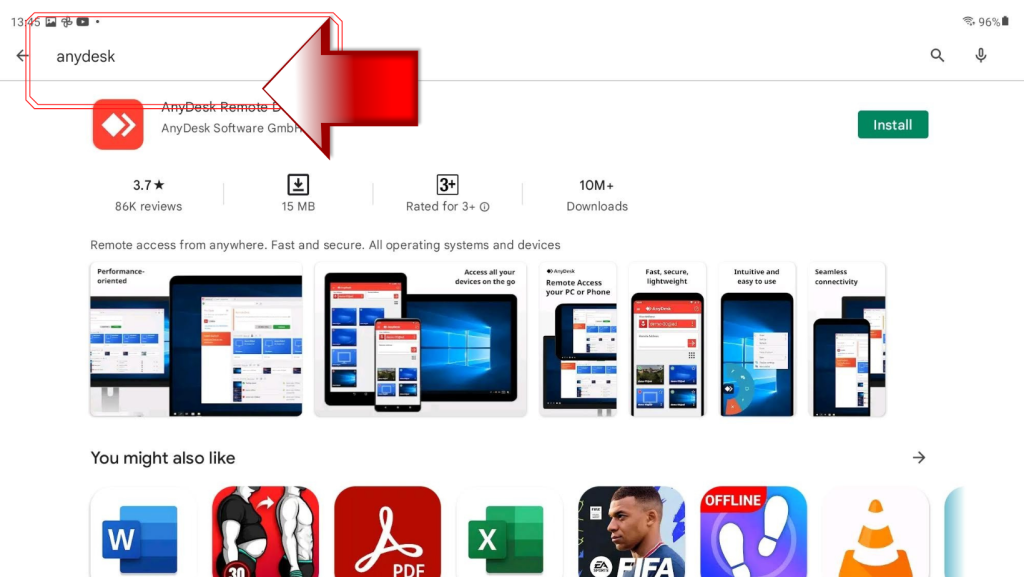 2. Look for AnyDesk App.
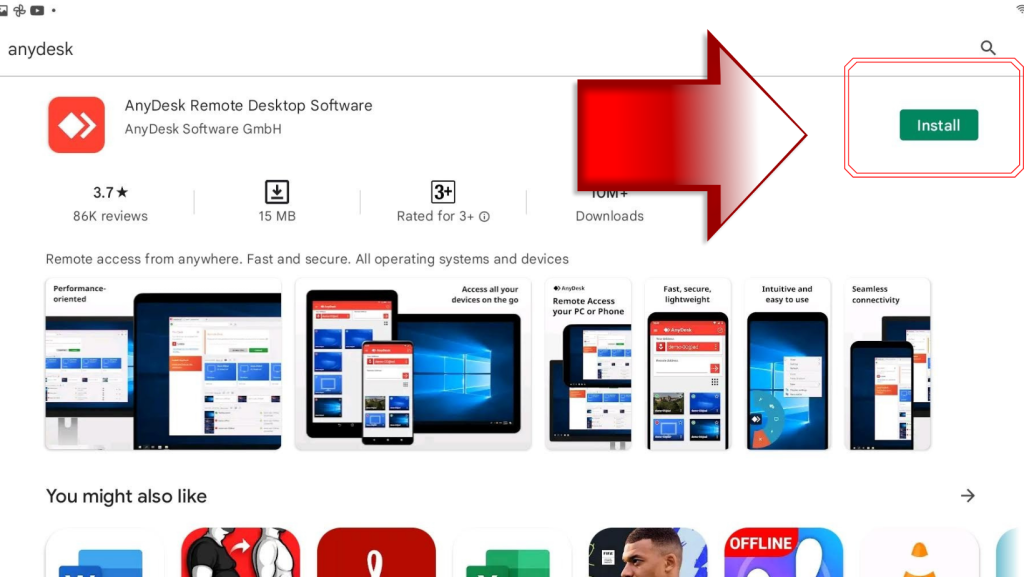 3. Click “Install”
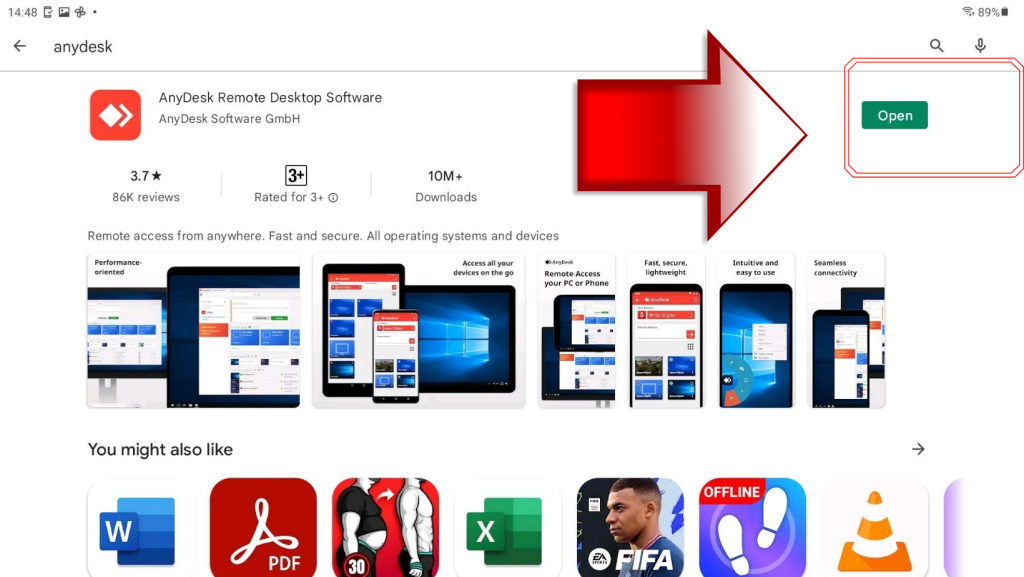 4. Click “Open”.
 5. Click “Ok”
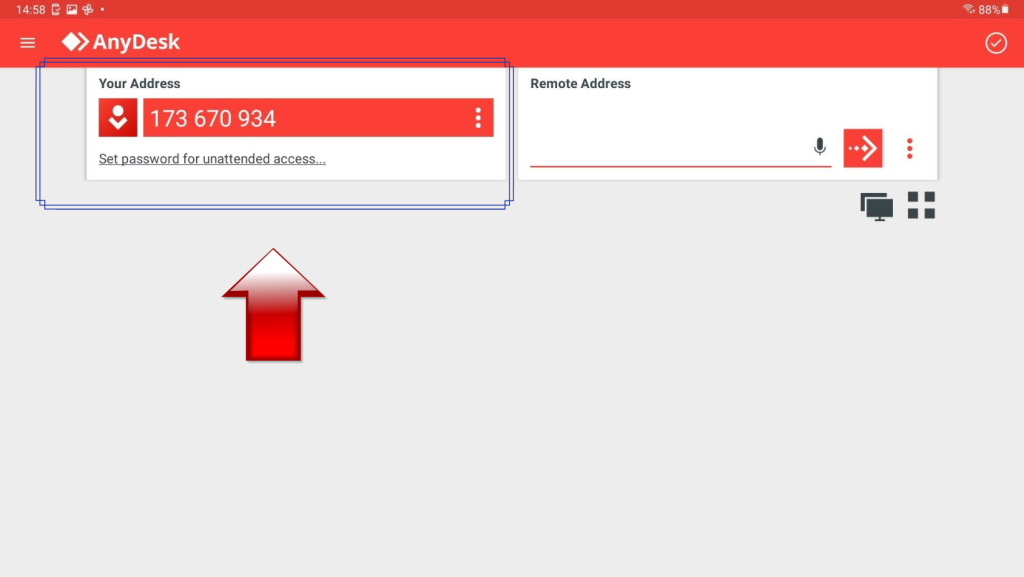 6. Let BrandK Support team get your address. Connect BrandK Support via WhatsApp.
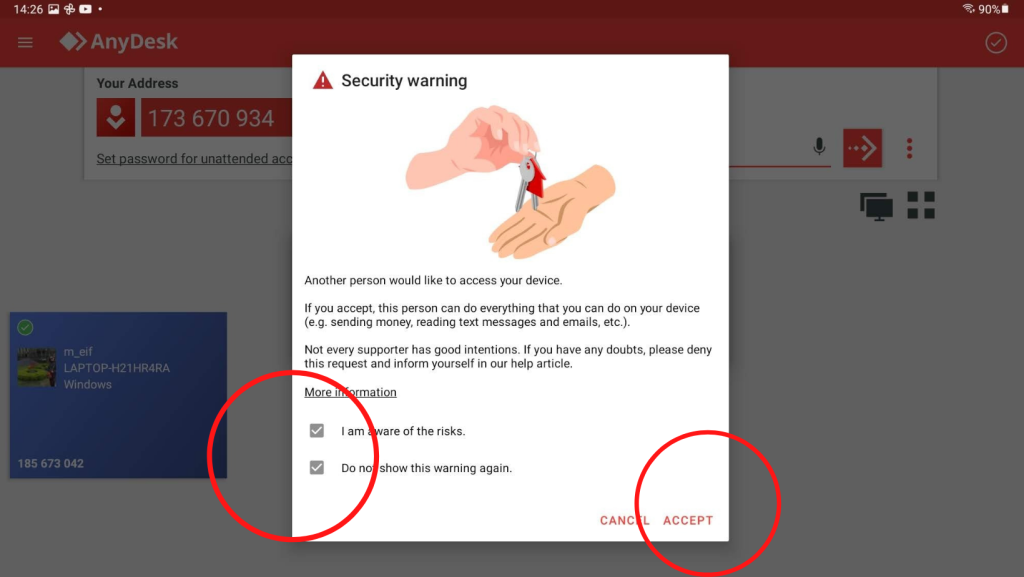 7. Once BrandK Support connected. Tick “ I am aware of the risk” & “Do not show this warning again, then “accept”.
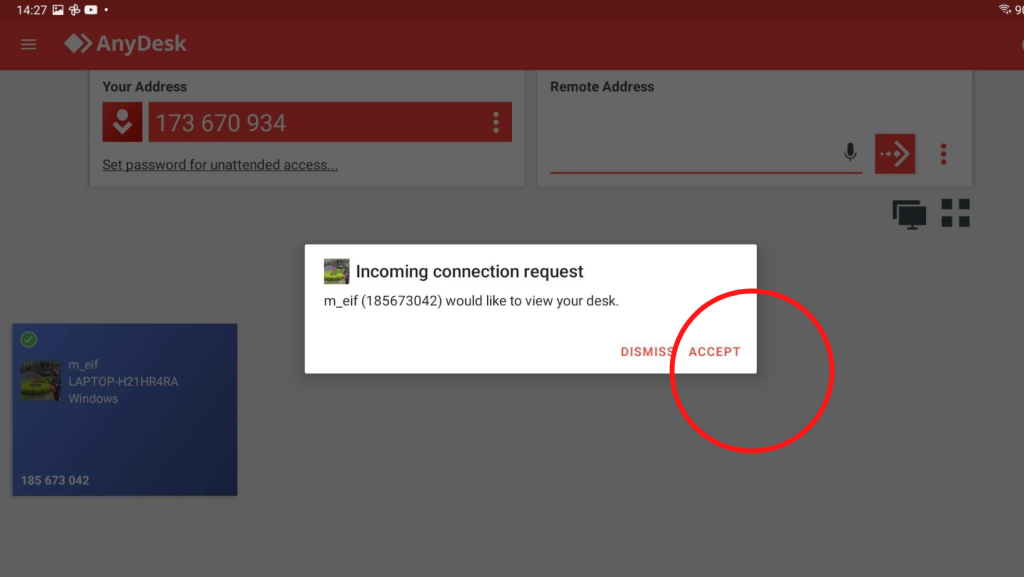 8. Click “accept” for Incoming connection request.
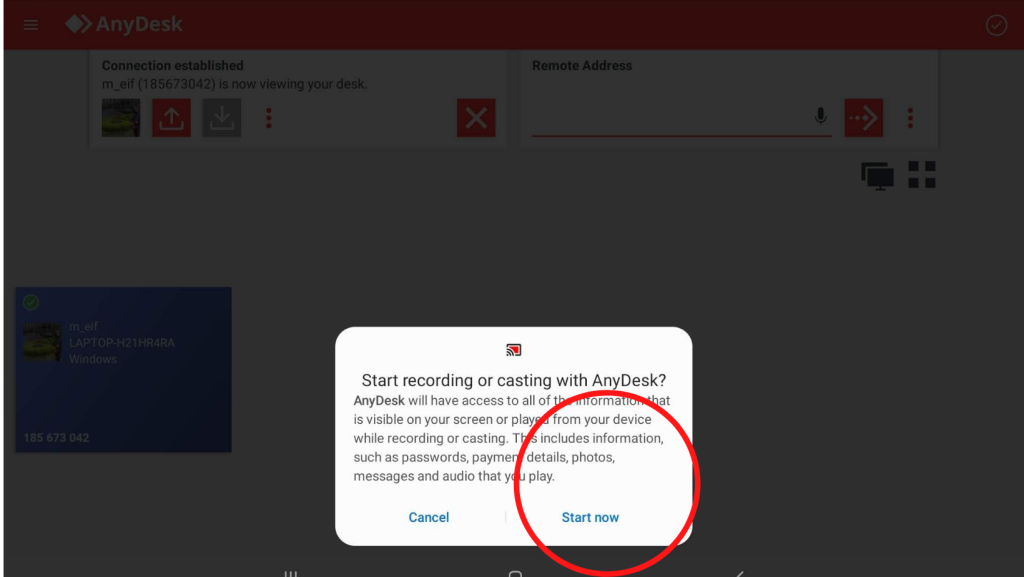 9. Click “Start Now”.
10. BrandK Support will control your tablet remotely.
[Menu] How to submit Menu Picture to BrandK support?
Video
Step by Step Guide
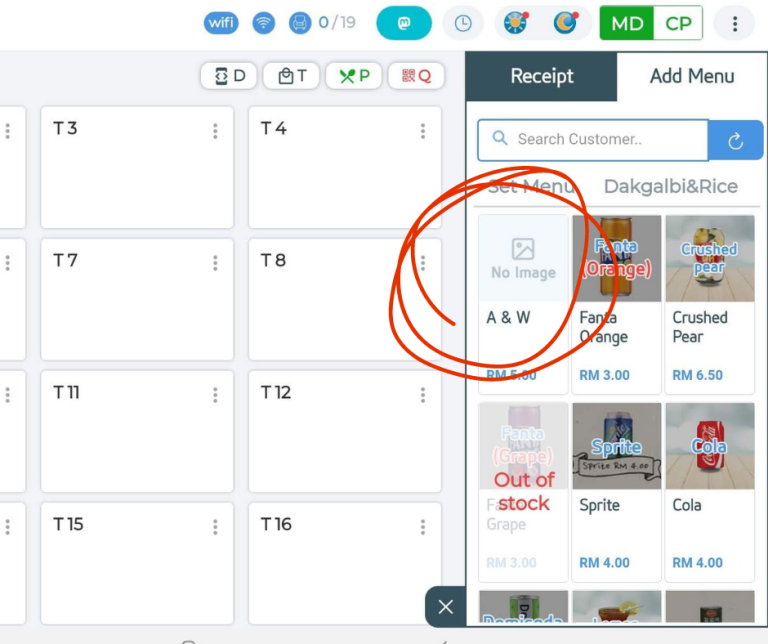 1. Make sure the menu is successfully key in into POS System (KPosCahsier) under “Manage Menu”
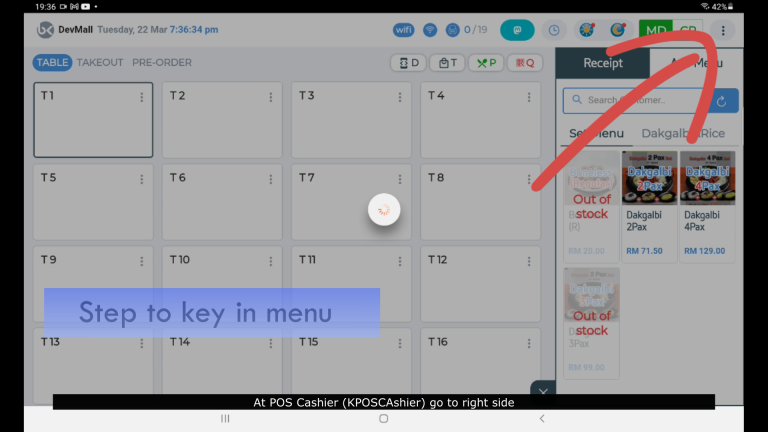 2. If you are not sure how to key in menu, please follow the below step to insert new menu. At POS Cashier (KPOSCAshier) go to right side.
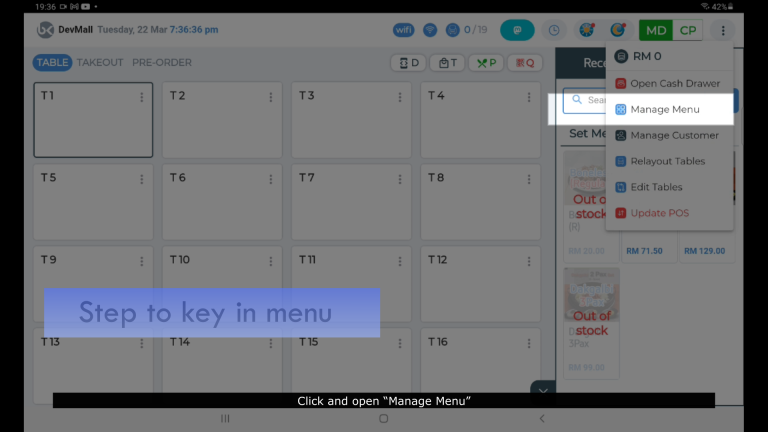 3. Click and open “Manage Menu”.
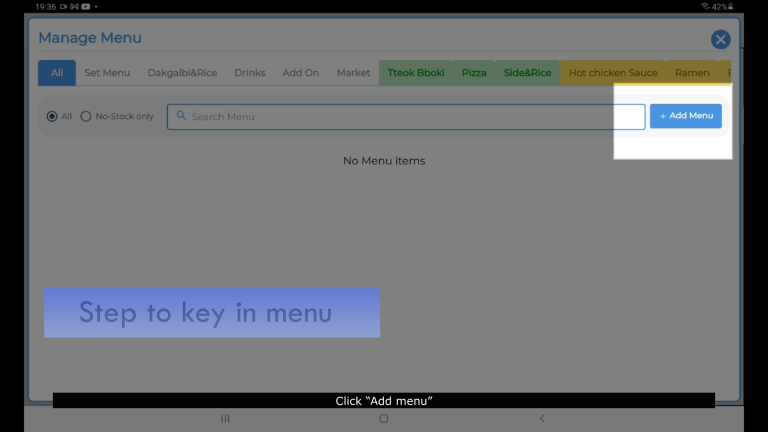 4. Click “Add menu”
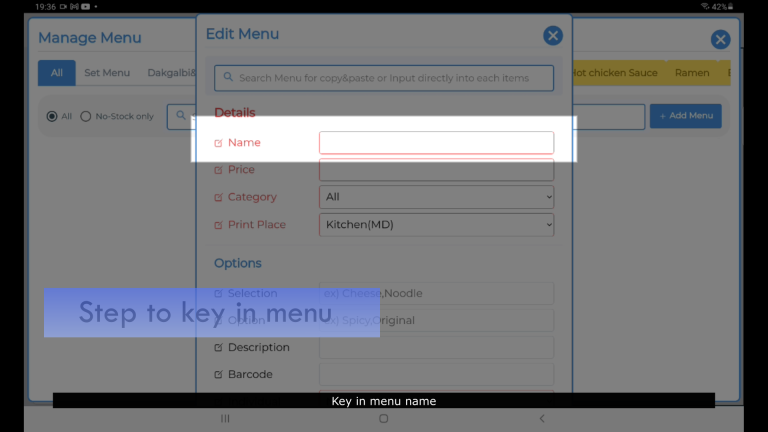 5. Key in menu name.
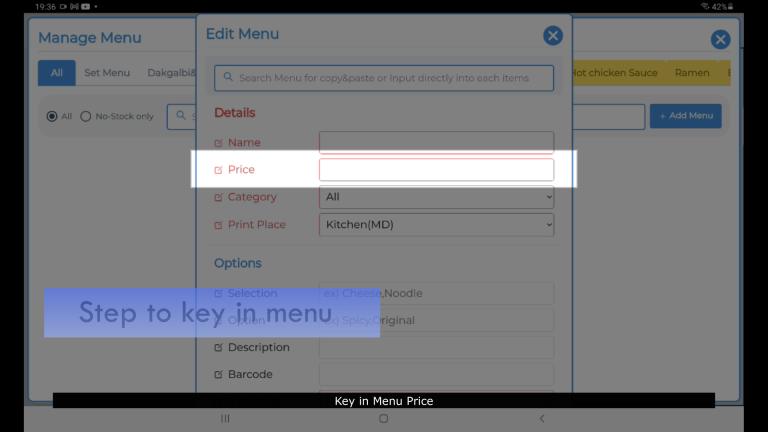 6. Key in Menu Price.
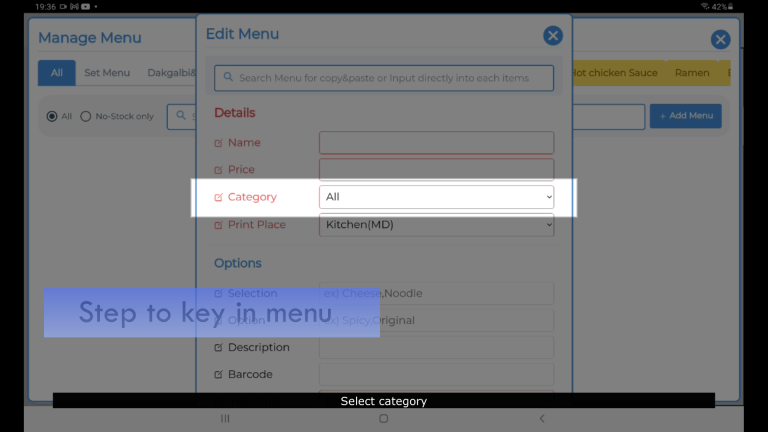 7. Select category.
 8. Select menu preparation station. Kitchen or Bar?
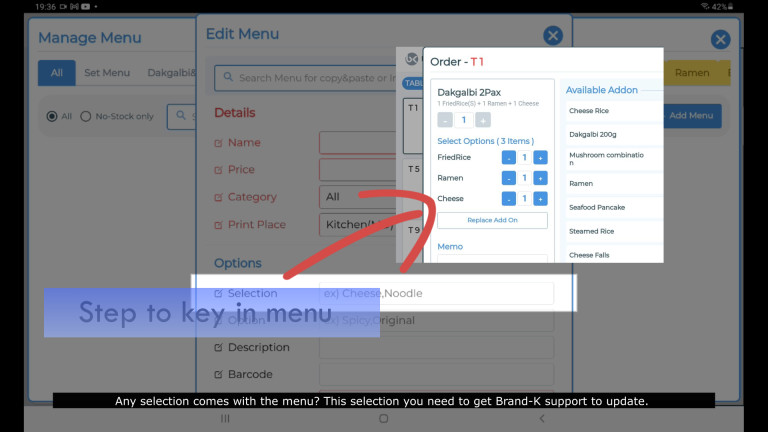
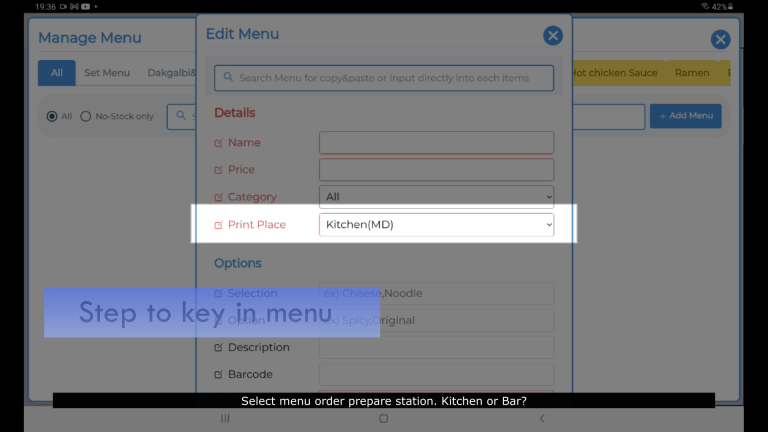 9. Any selection comes with the menu? This selection you need to get Brand-K support to update,
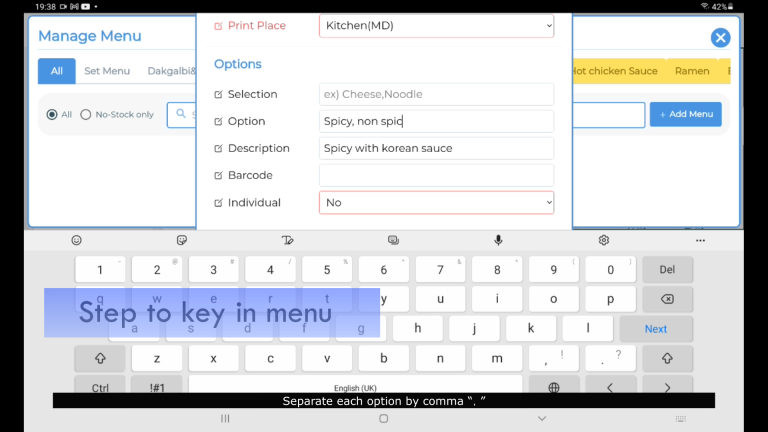 10. Any Option for customer? Like spicy or non-spicy. Separate each option by comma “,”
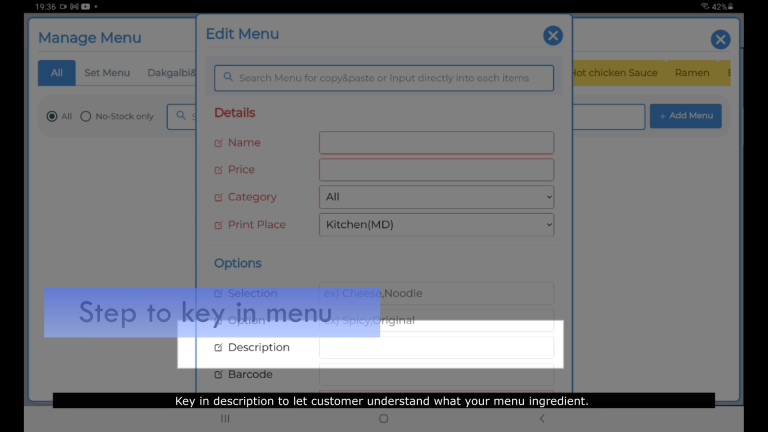 11. Key in description to let customer understand what your menu ingredient.
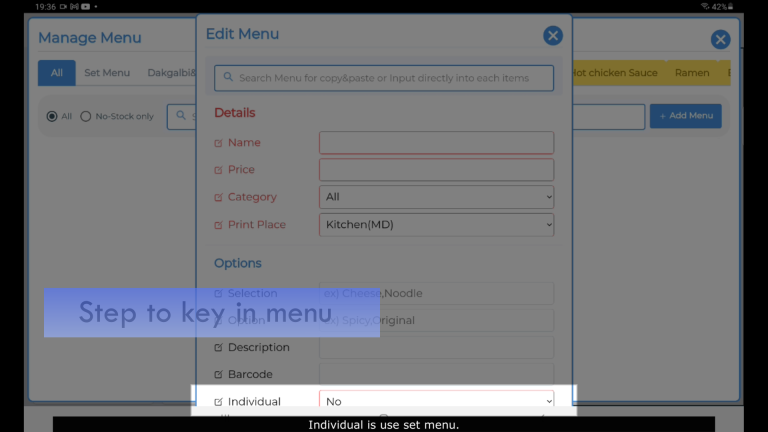 12. Individual is use for Set menu.
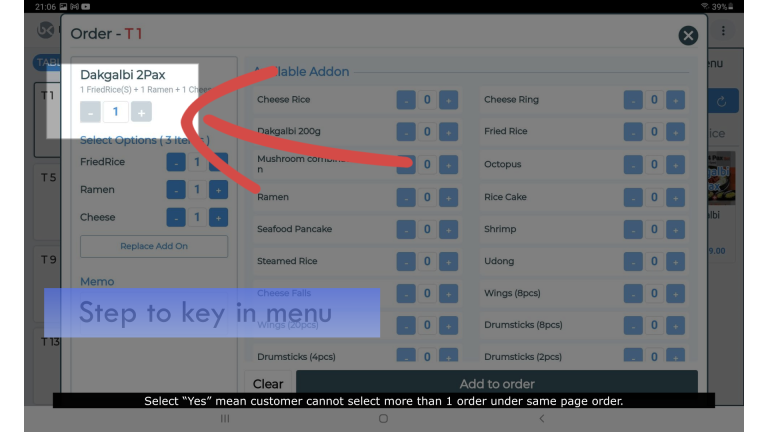 13. Select “Yes” mean customer cannot select more than 1 order under same page order.
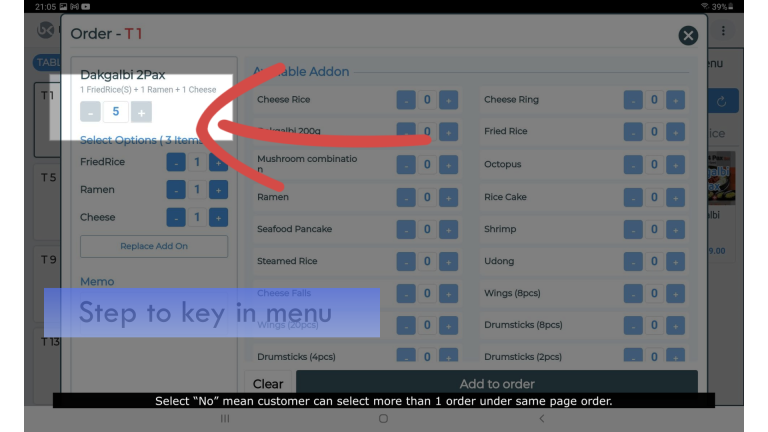 14. Select “No” mean customer can select more than 1 order under same page order.
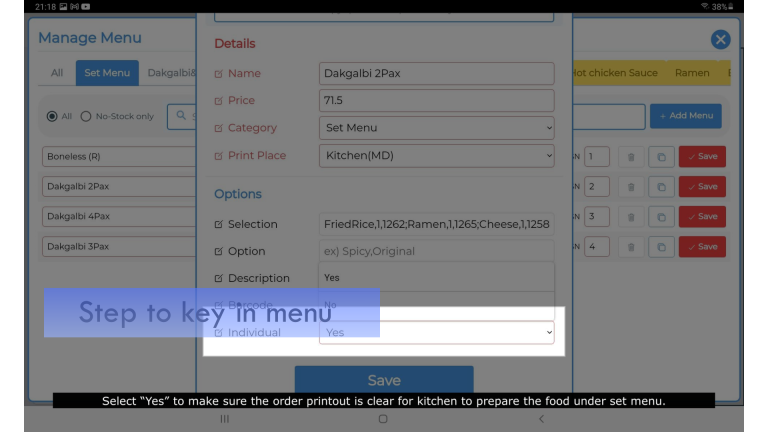 15. Select “Yes” to make sure the order printout is clear for kitchen to prepare the food under set menu.
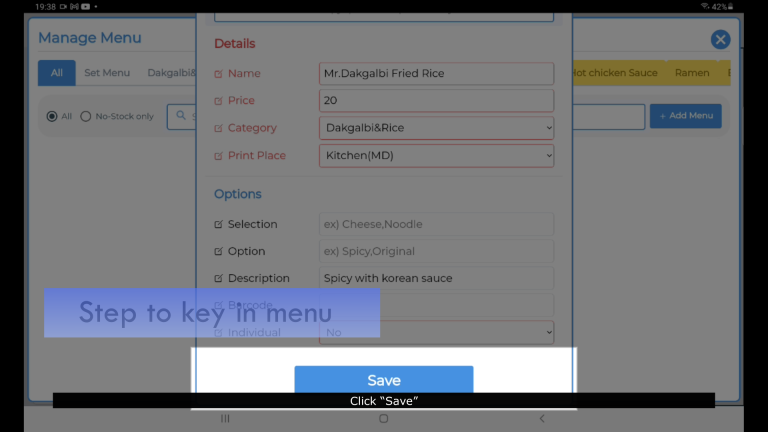 16. Click “Save”
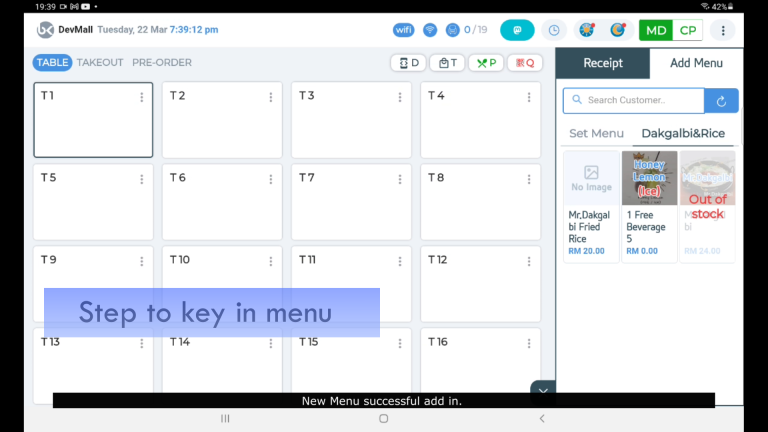 17. New Menu successful add in.
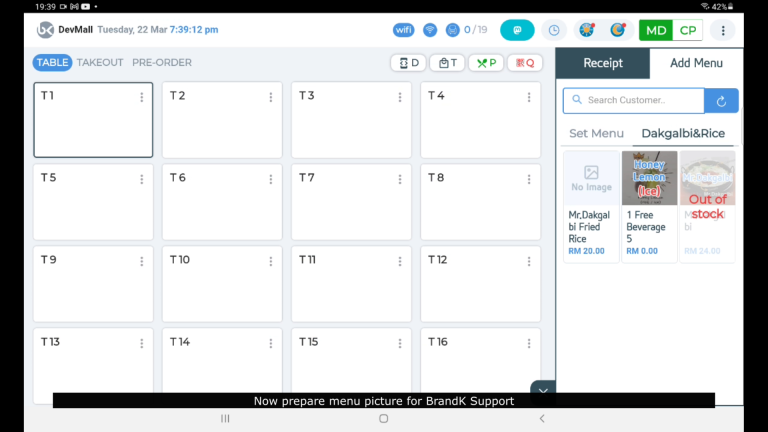 18.Now prepare menu picture for BrandK Support
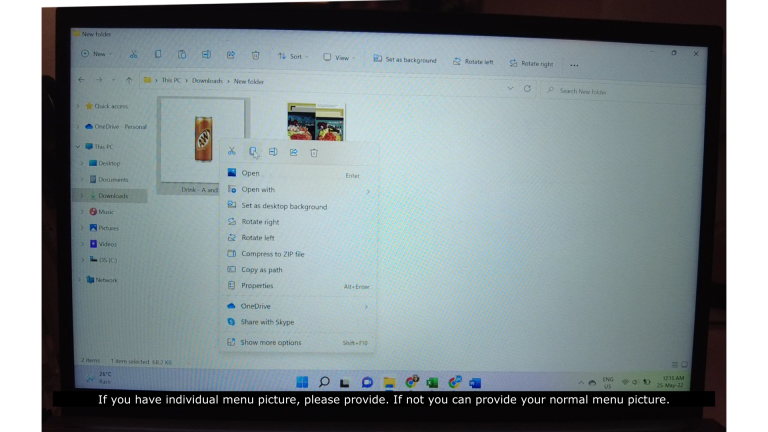 19. If you have individual menu picture, please provide. If not you can provide your normal menu picture.
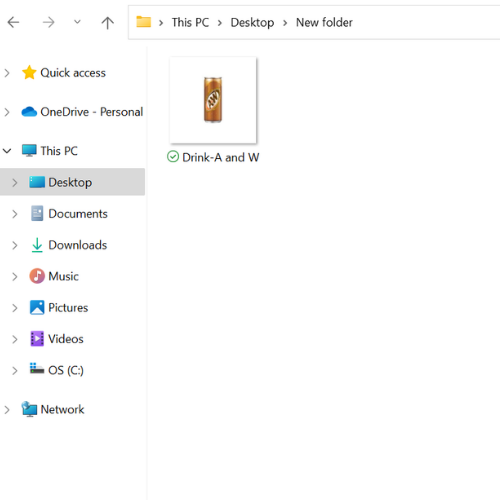 20. Label each picture name start with Menu Category – item name (example: drink-A and W)
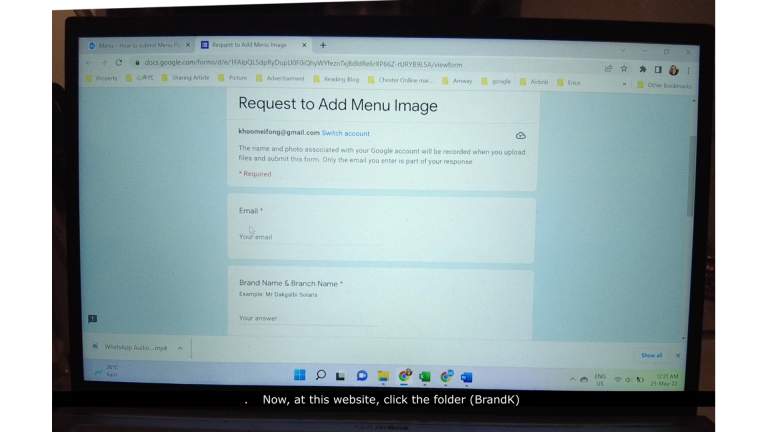 22. Key in your email address
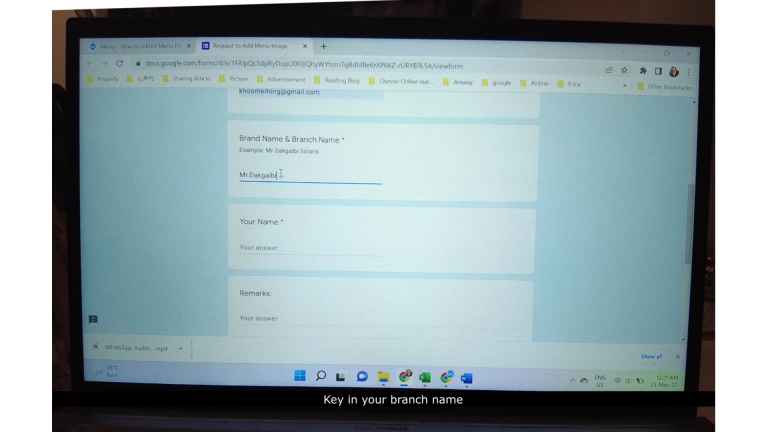 23. Key in your branch name
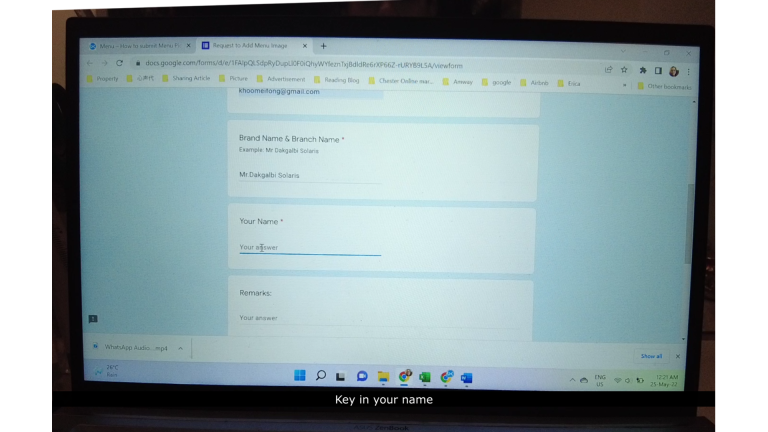 24. Key in your branch name
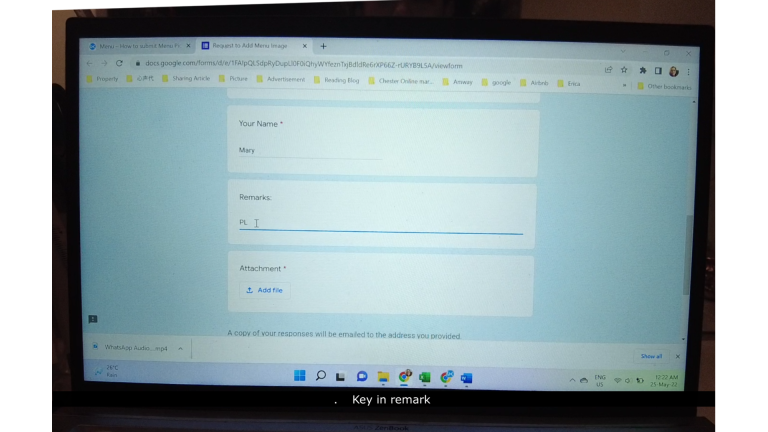 25. Key in remark
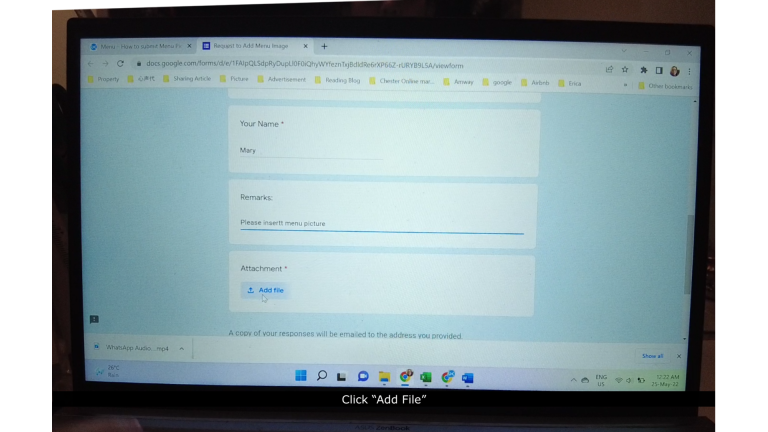 26. Click “Add File”
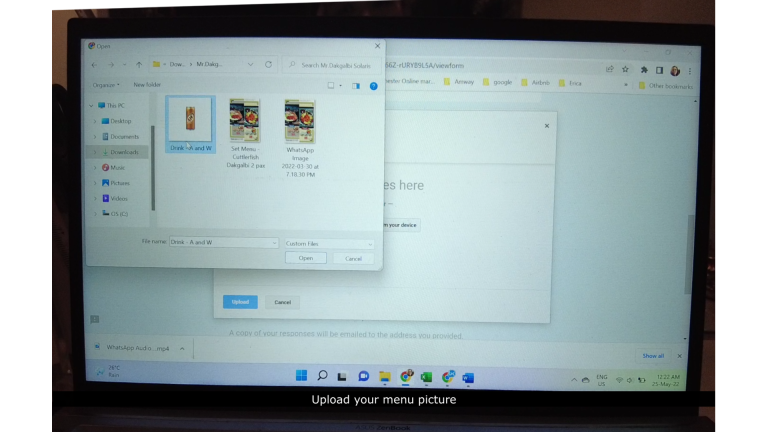 27. Upload your menu picture
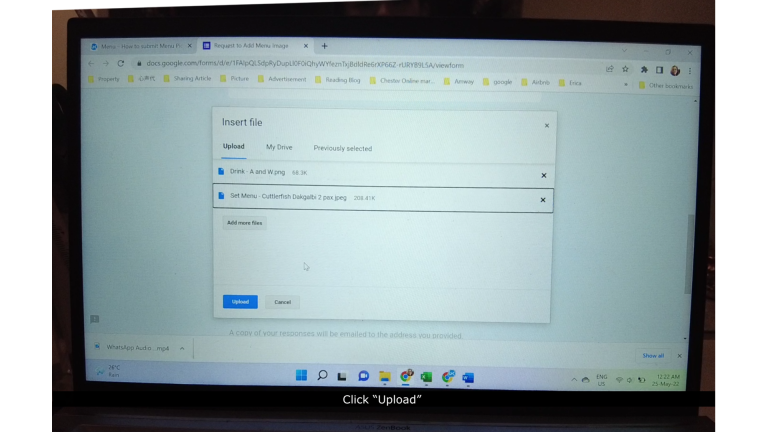 28. Click “Upload”
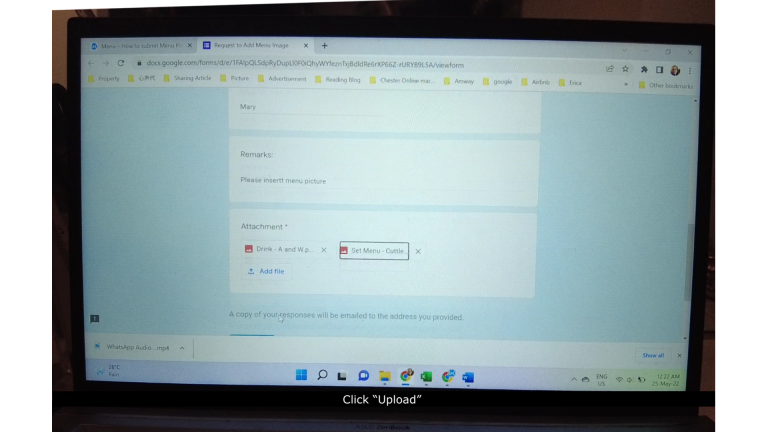 29. Click “Submit”
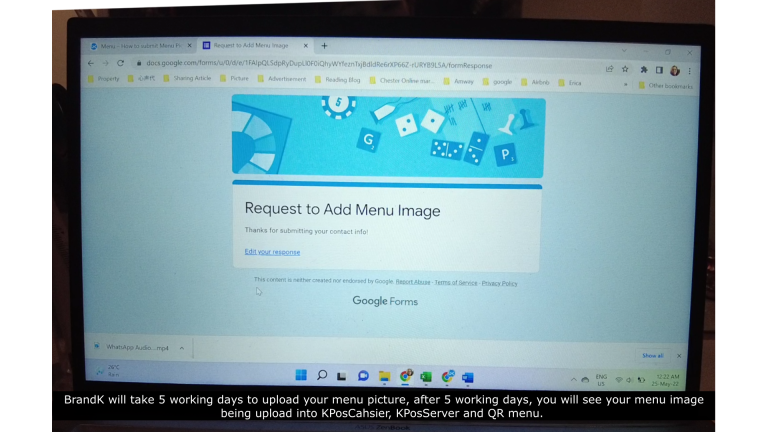 30. BrandK will take 5 working days to upload your menu picture, after 5 working days, you will see your menu image being upload into KPosCahsier, KPosServer and QR menu.
[Printer] – Error "Host unreachable"
Video
Step by Step Guide
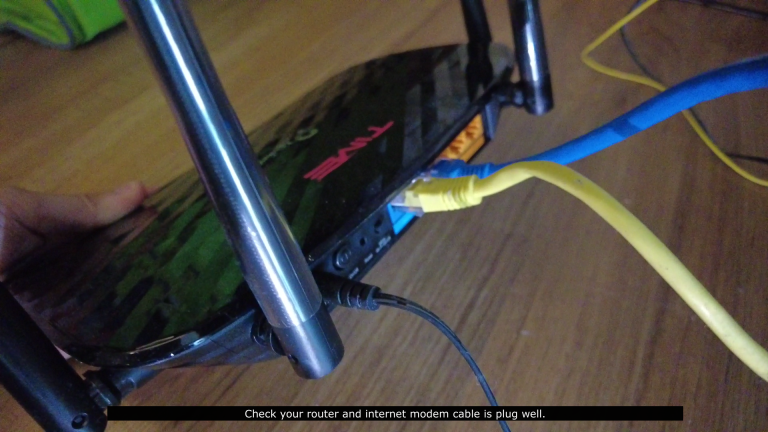 1. Check your router and internet modem cable is plug well.
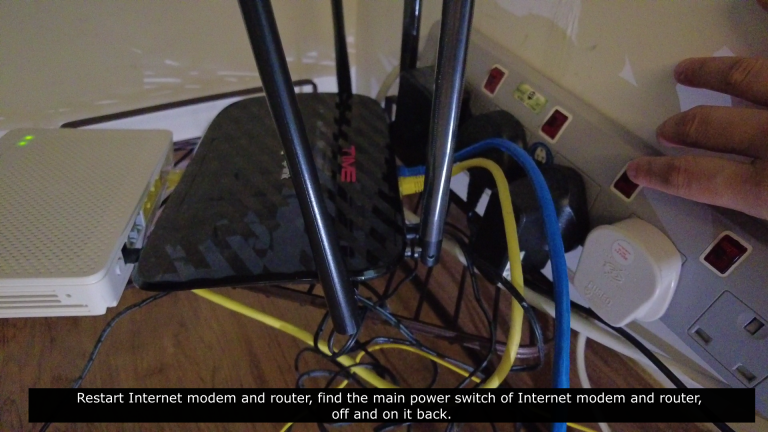 2. Restart Internet modem and router, find the main power switch of Internet modem and router, off and on it back.
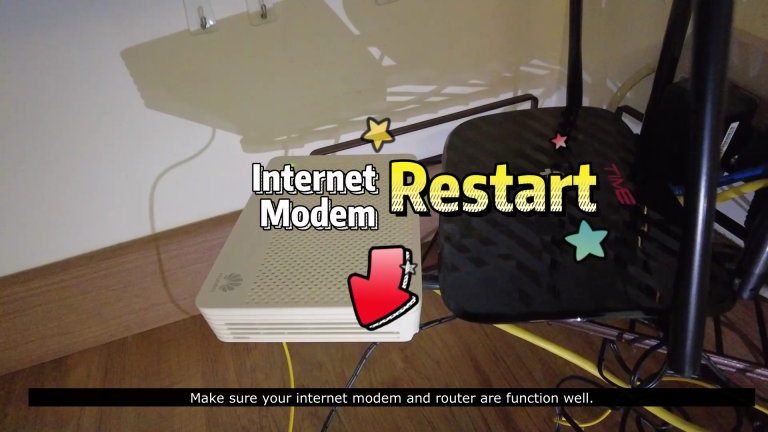 3. Make sure your internet modem and router are function well.
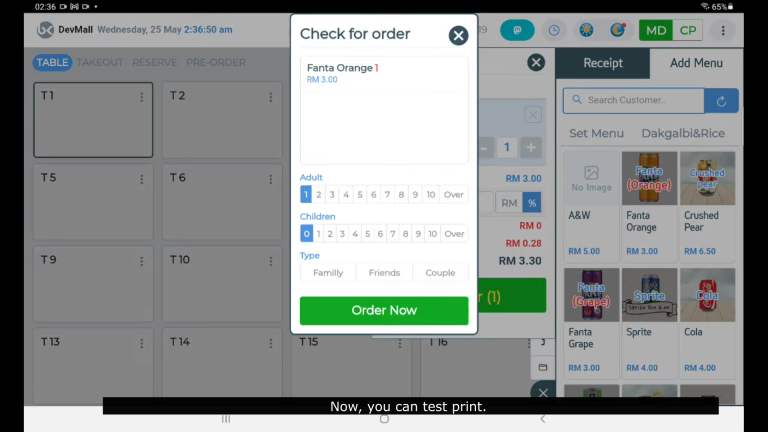 4. Now, you can test print.
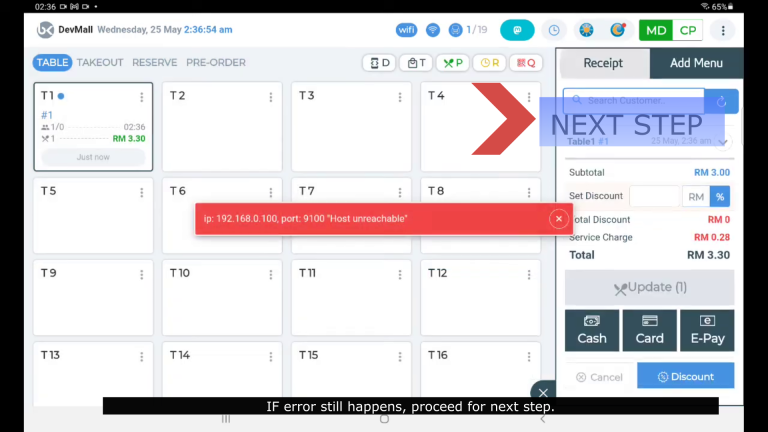 5. If error still happens, proceed for next step.
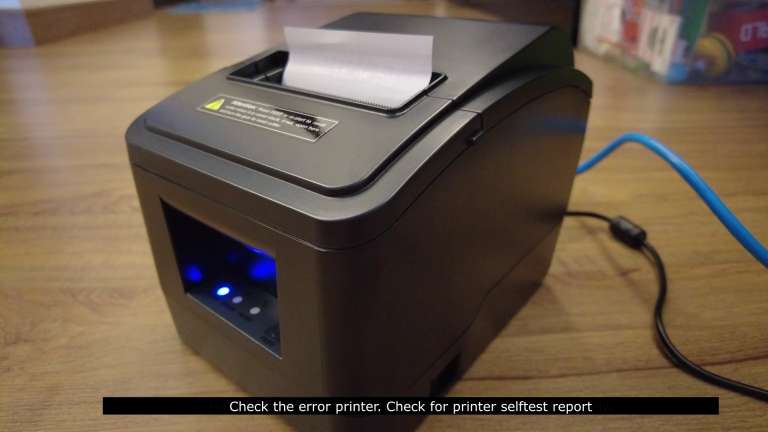 6. Check the error printer. Check for printer selftest report
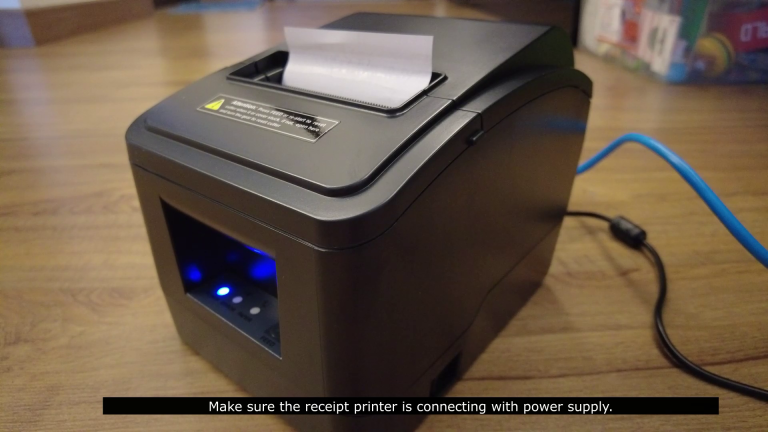 7. Make sure the receipt printer is connecting with power supply..
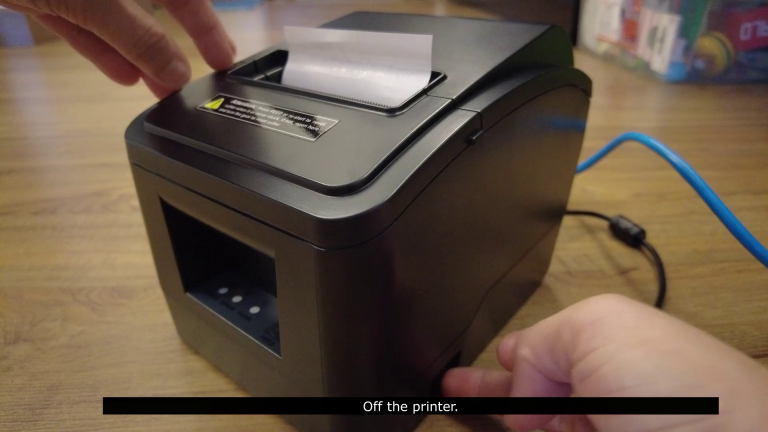 8. Off the printer.
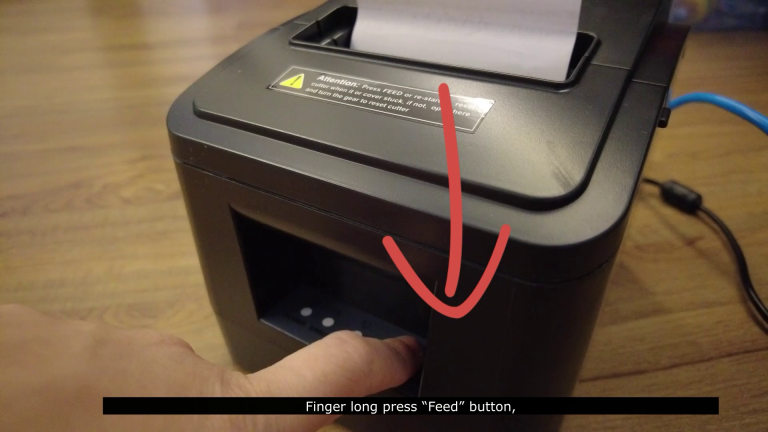 9. Finger long press “Feed” button.
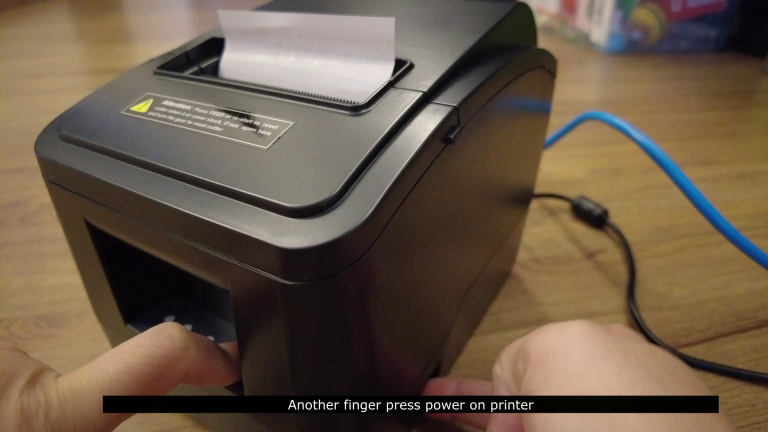 10. And another finger press power on printer.
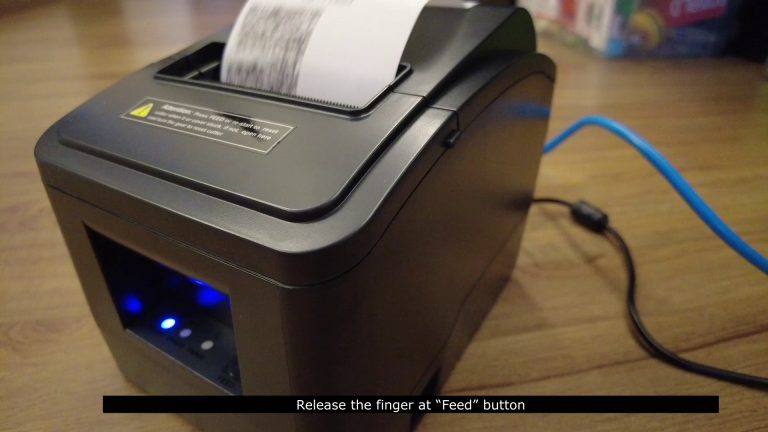 11.Release the finger at “Feed” button.
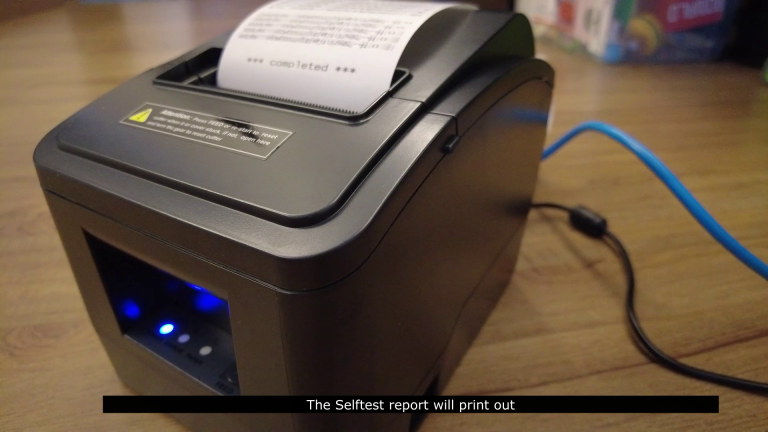 12.The Selftest report will print out.
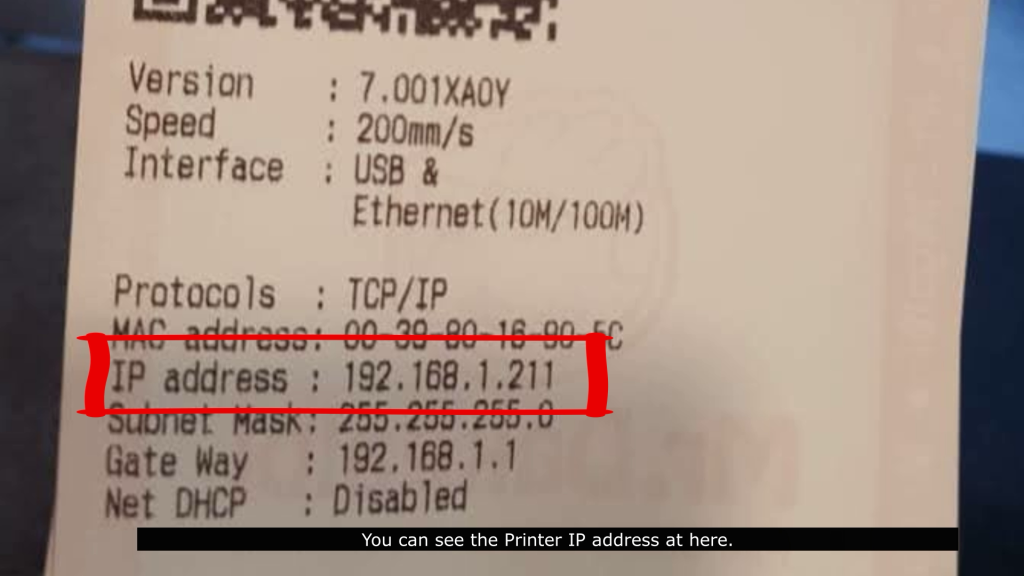 13. You can see the Printer IP address at here.
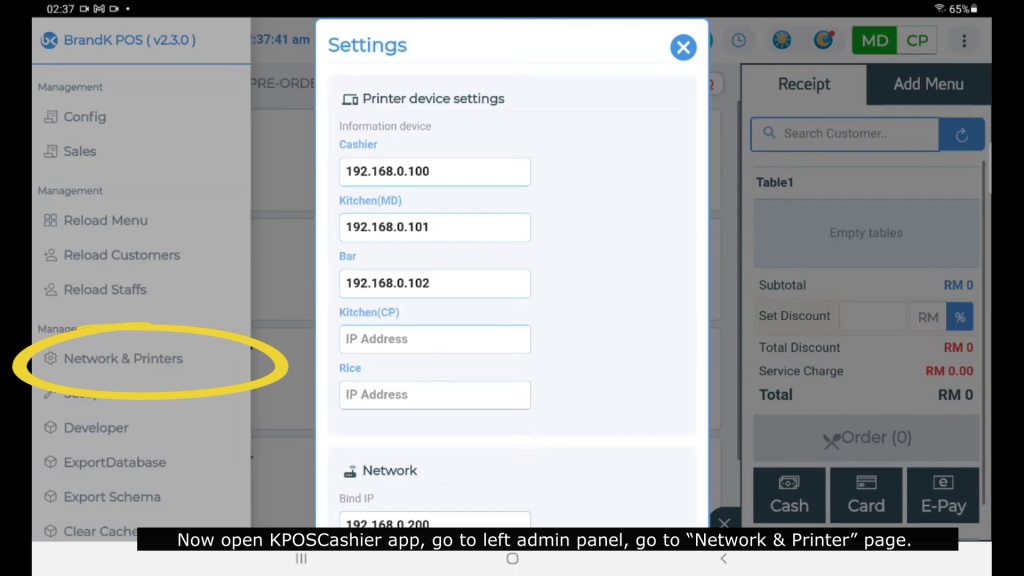 14. Now open KPOSCashier app, go to left admin panel, go to “Network & Printer” page.
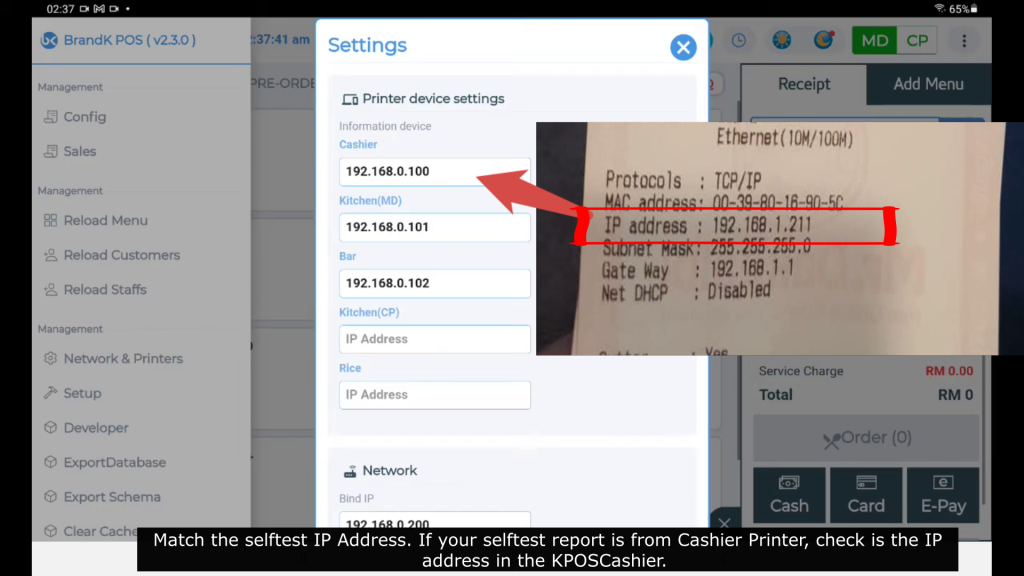 15. Match the selftest IP Address. If your selftest report is from Cashier Printer, check is the IP address in the KPOSCashier. IP address must same as selftest report. If not same, please key in the IP address in the selftest report into KPOSCashier tablet. And if others printer has error, check for others printer selftest report and check IP.
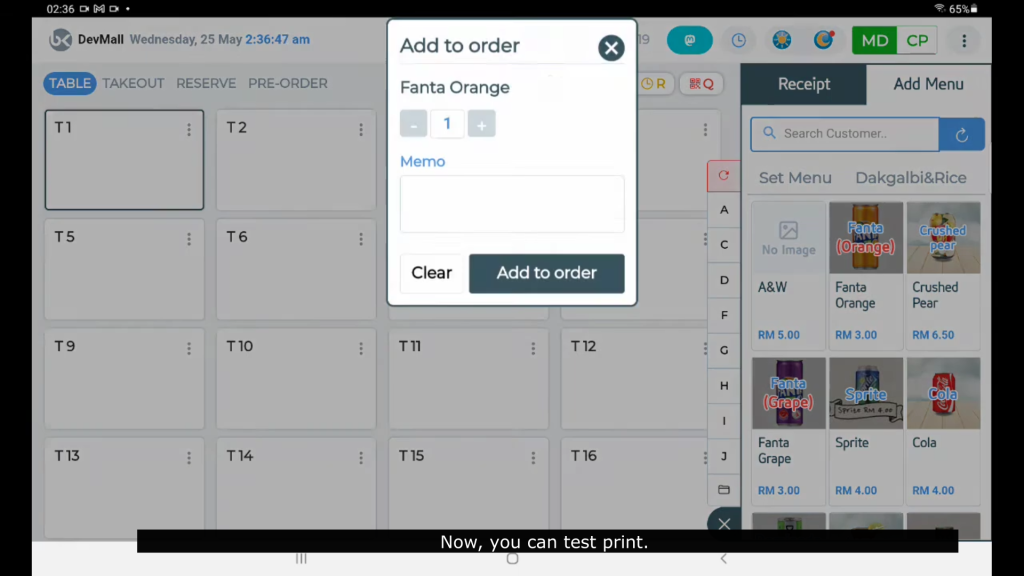 16. Now, you can test print.
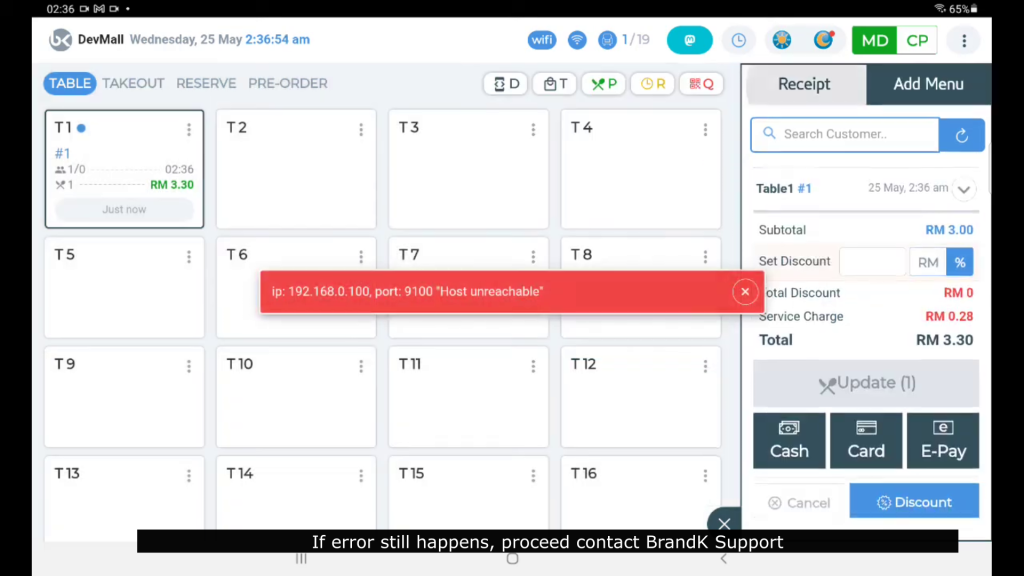 17. If error still happens, proceed contact BrandK Support.
[Printer] – How to stop printing order receipt under app delivery order?
Video
Step by Step Guide
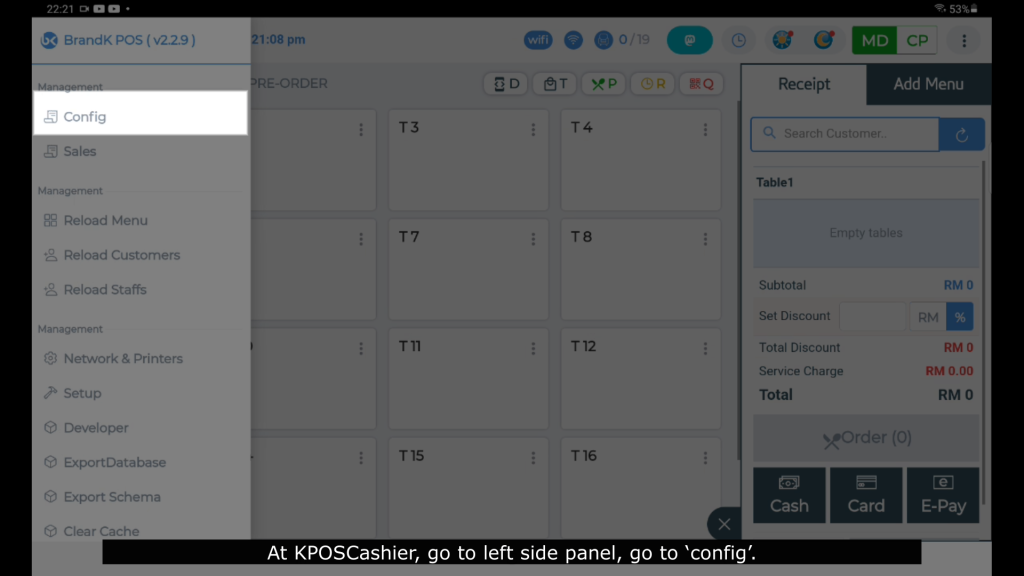 1. At KPOSCashier, go to left side panel, go to ‘config’.
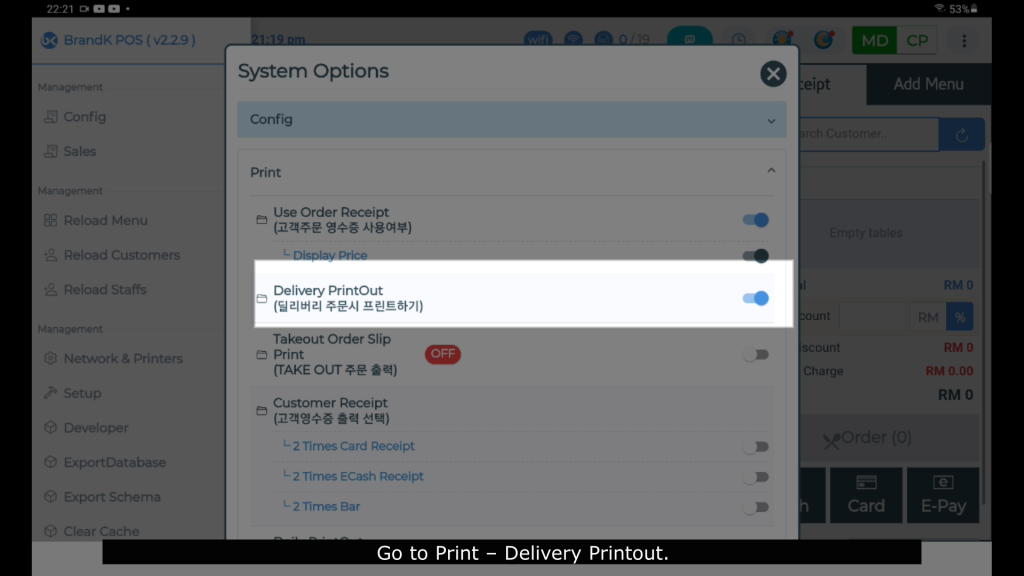 2. Go to Print – Delivery Printout.
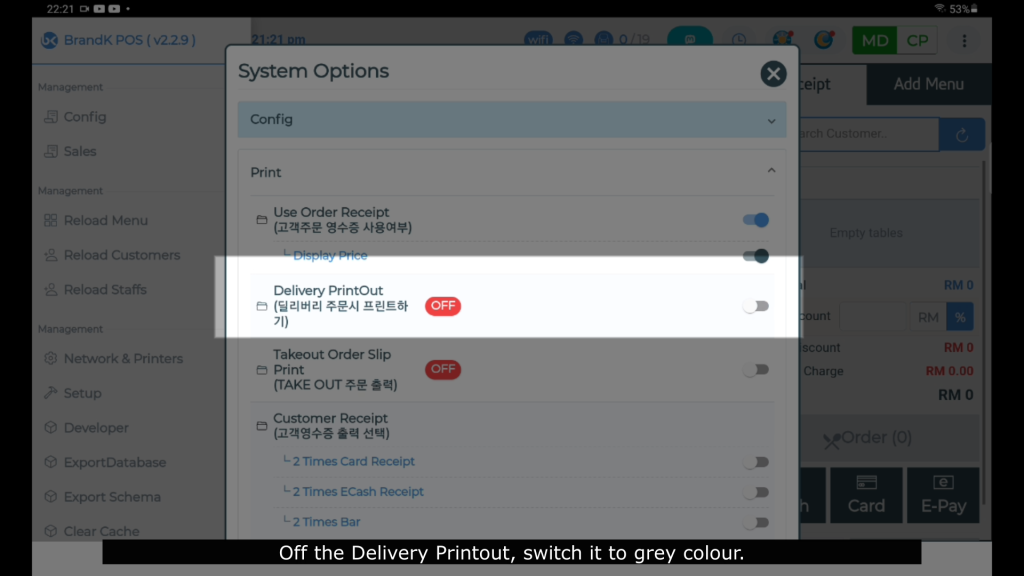 3. Off the Delivery Printout, switch it to grey colour.
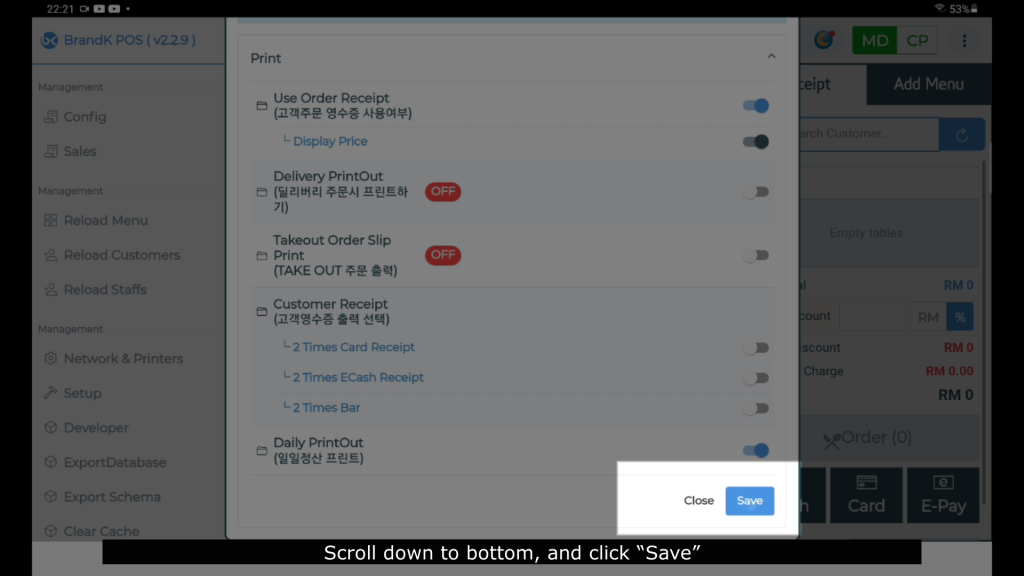 4. Scroll down to bottom, and click “Save”.
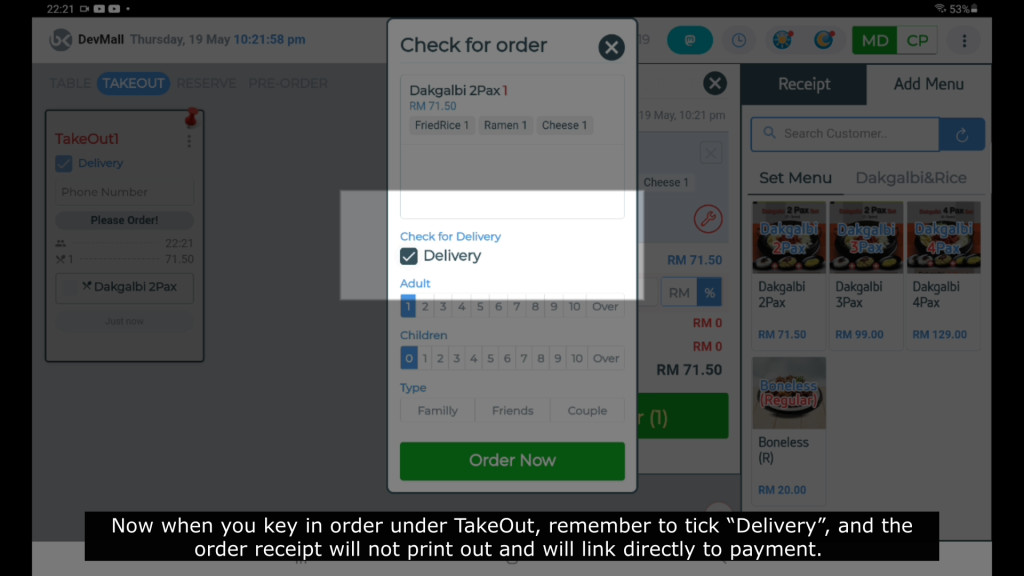 5.Now when you key in order under TakeOut, remember to tick “Delivery”, and the order receipt will not print out and will link directly to payment.
